A teacher is a user that controls his own organization. An organization can have several teachers, and they all can create and manage courses. One teacher can also belong to several organizations.
As a teacher, you can create fully functional courses from available templates. You can customize exercise sets, their deadlines and unlock conditions etc. Courses can also have customized feedback questions which are shown to students after they have successfully submitted an exercise.
Courses can also have course assistants. Course assistants can do the same things as teachers, but only for specified courses. A teacher is an per-organisation role, while the course assistant is a per-course role.
NB: If you are using the TestMyCode service hosted by the University of Helsinki, the correct TestMyCode address for custom organisations is https://tmc.mooc.fi/. Note that user accounts created for https://tmc.mooc.fi/mooc are not available here. You are free to reuse the same username and email if you wish to do so.
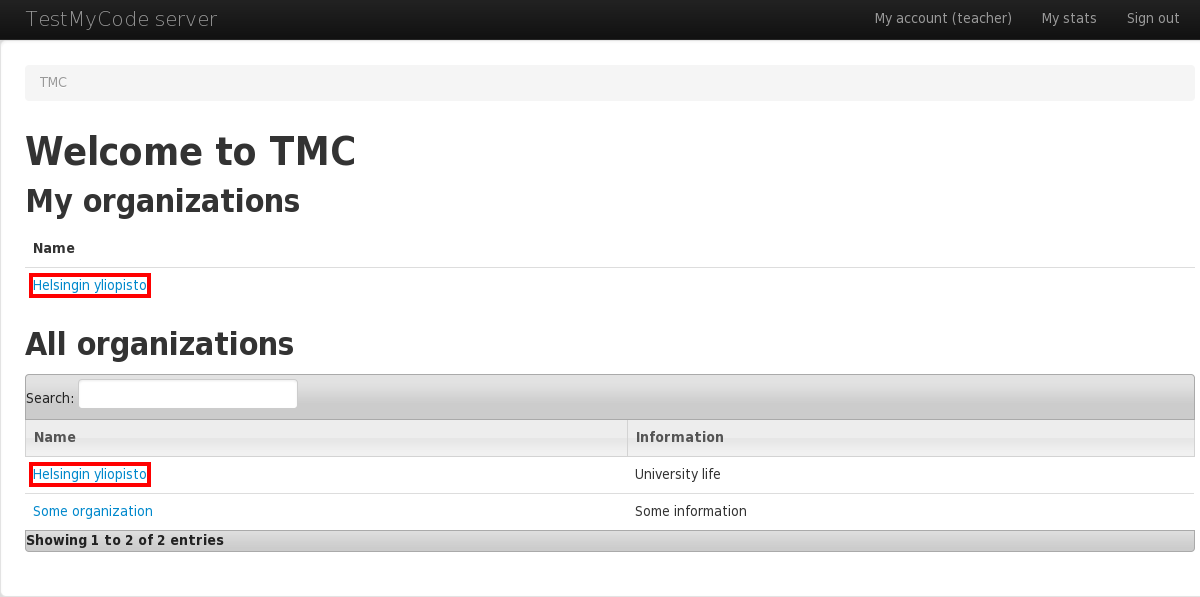
When you are rolling out TMC for your own teaching, the first step is to create your own organization. If your organization is big, such as a larger school, it's good to check from the front page if the organization already exists in the system. If it is already found, you should contact the other teachers and ask them for access to your organization. We would like to avoid making multiple organisations for a single high school, for example.
To create a new organization, you have to be logged in at https://tmc.mooc.fi. Note that user accounts created for the public-for-all MOOC-version of the service (https://tmc.mooc.fi/mooc) are not available in this version of the service. If needed, click the Sign up link and create your personal account. When logged in, go to url /org/new in the TMC system, (for example http://tmc.mooc.fi/org/new).
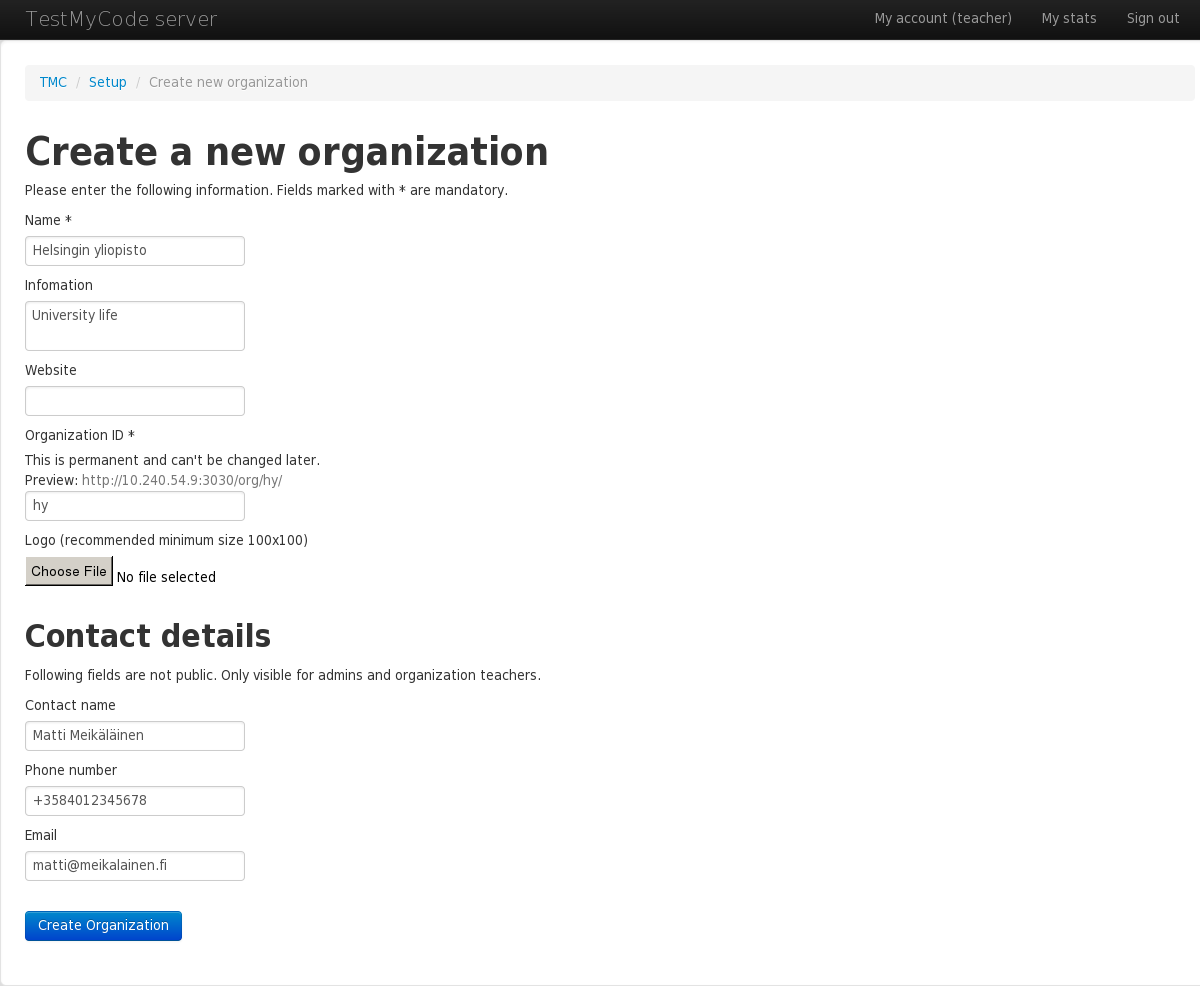
You will then be presented with a form with following fields, all of which can be changed later:
Also enter your contact details for TMC administrative purposes. These are not shown publicly.
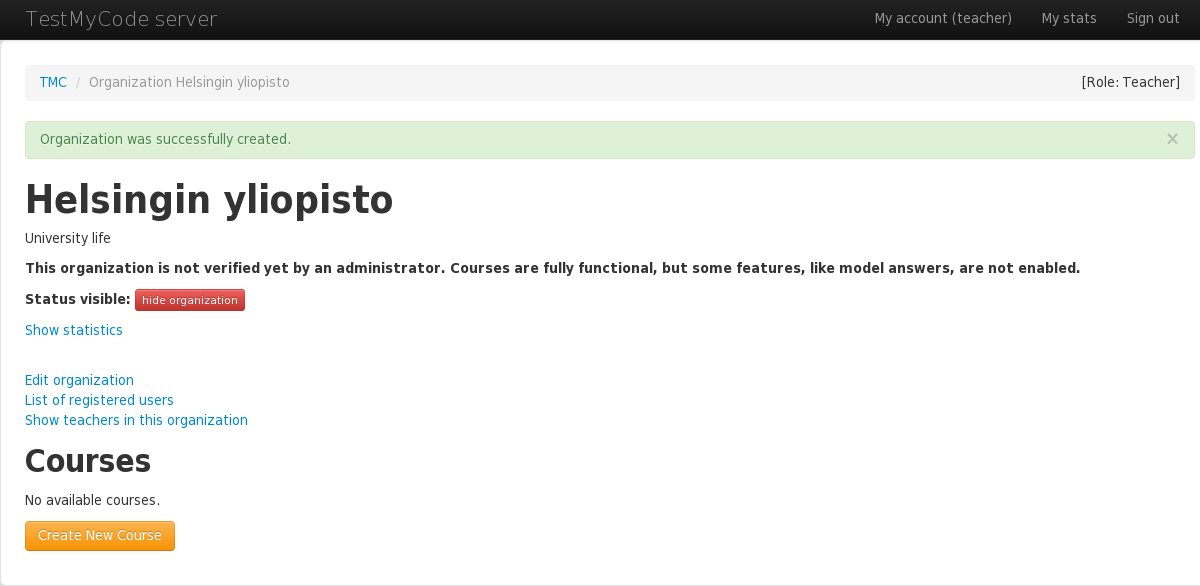
When you have successfully created your organization, it is ready for use. Some functionalities, like model answers, are not available until administrators have verified the organization. When logged in, your organization is listed separately on TMC front page. Verified organizations are also publicly listed.
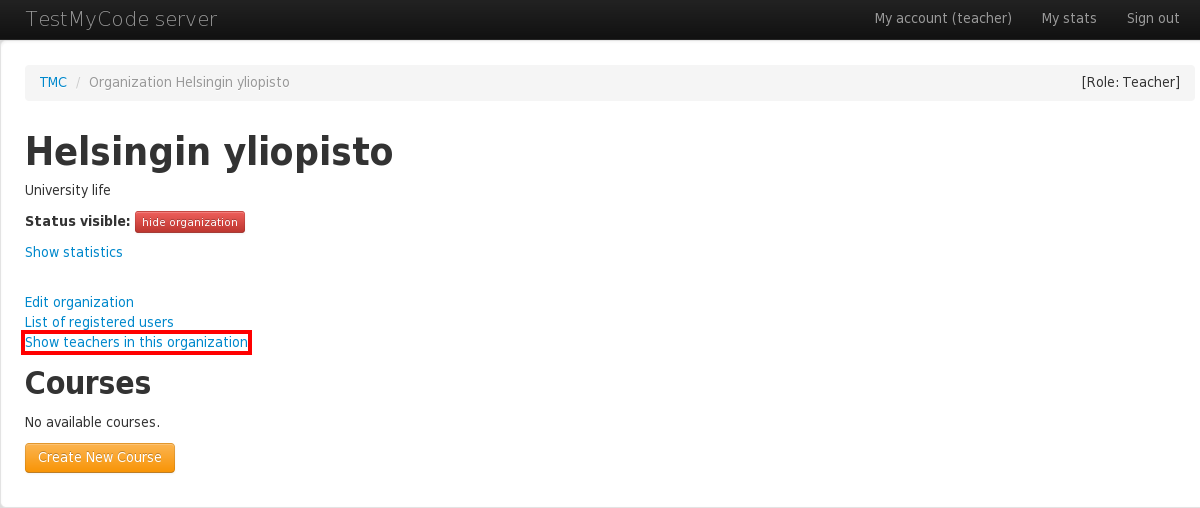
As a teacher, you can list, add and remove teachers in your organization. From the organization front page, you can find link to list all the teachers. Remember that all teachers in the organization have same access rights as you. We recommend you add any Teaching Assistants etc. as Course assistants.
To add a new teacher, you will have to know the teacher's exact username in TMC system. Type the username and click 'Add a new teacher'.
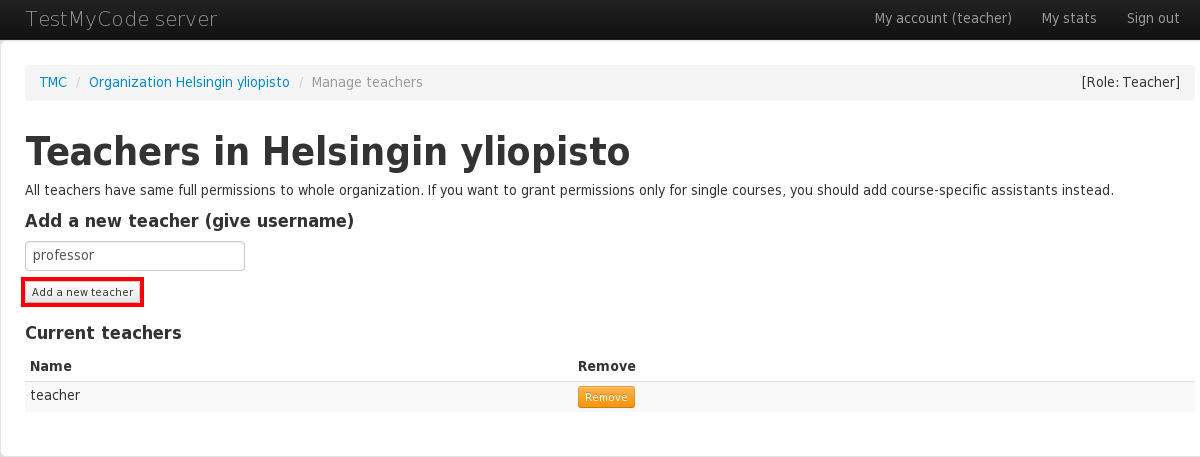
You can also remove an existing teacher by clicking the 'Remove' button next to their name.

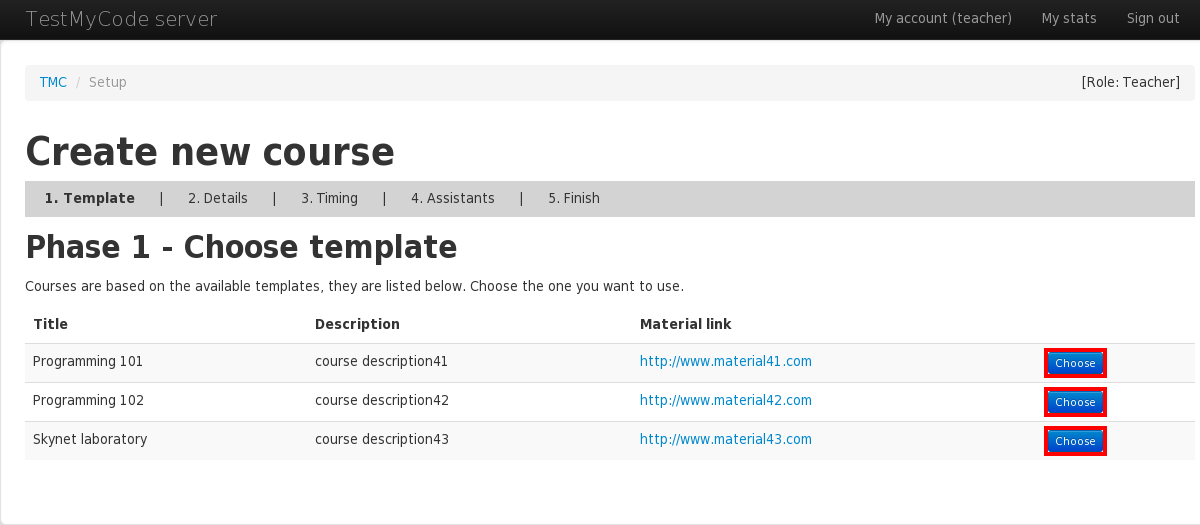
TMC offers a selection of course templates, from which you can create your own courses. Courses created from templates will include teaching material and sets of exercises. You can customize a course created from a template by setting or removing submission deadlines, exercise unlock conditions, feedback questions etc.
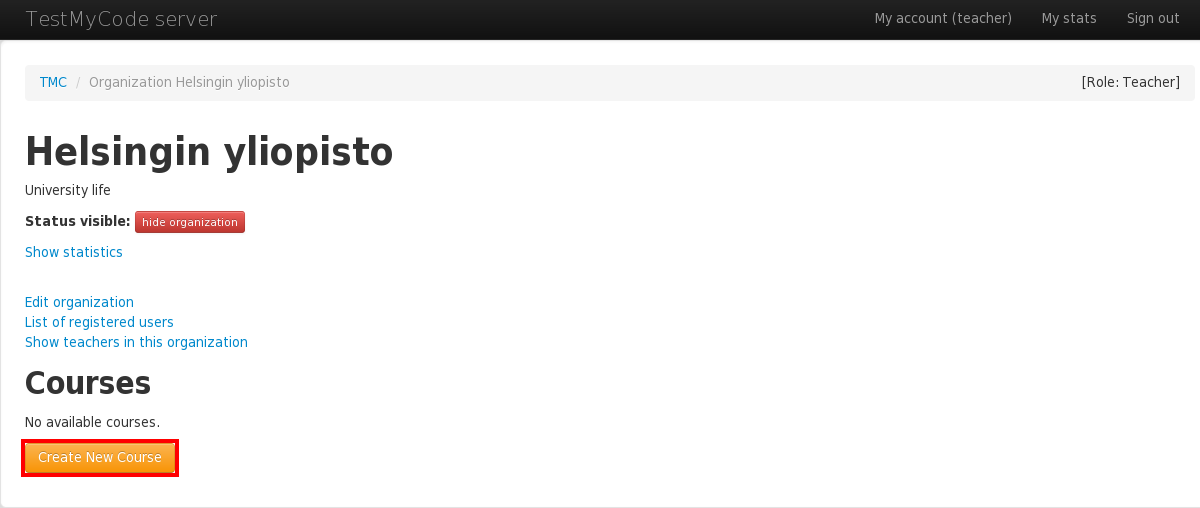
Creating a new course is done with a wizard that helps you go through the motions. To start the process, click the 'Create New Course' button from your organization's front page.
You will see a list of all available course templates. As needed, you can take a look at the course description and course material. Choose a suitable template and click the 'Choose' button next to it.
On the following form the fields will be prefilled with template defaults. You may change these fields to suit your needs.
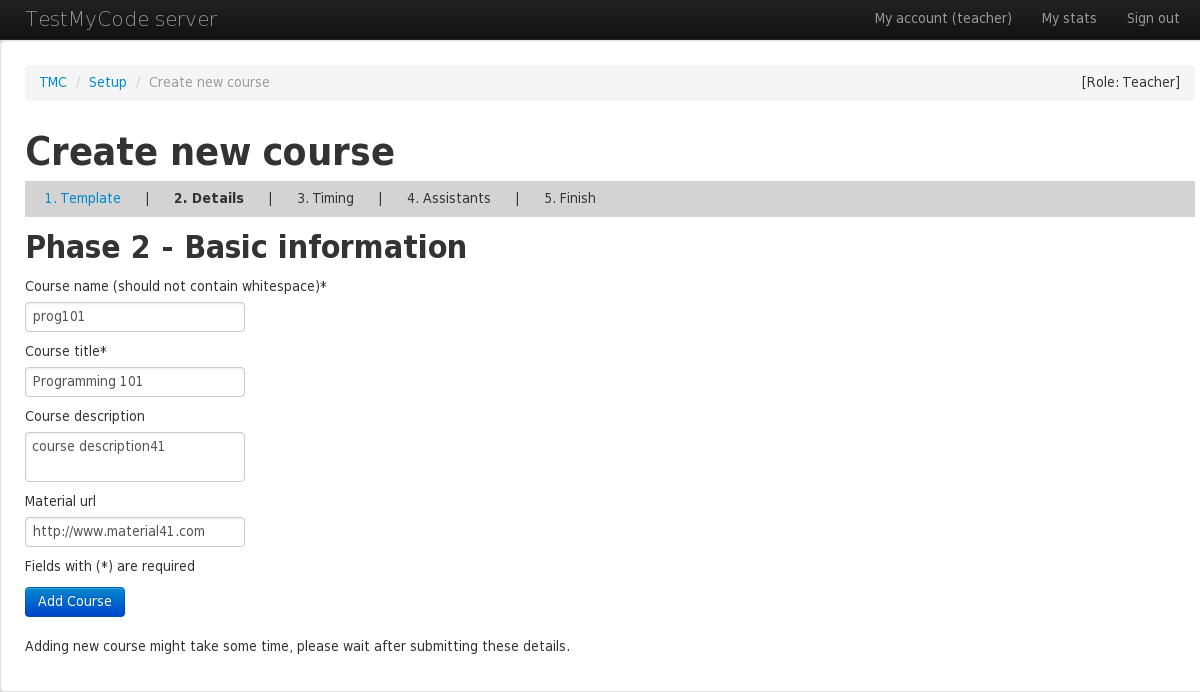
Finally, click the 'Add Course' button. This step might take some time as TMC populates the new course with exercices.
Here you can set the basic timing for the course's exercise sets. Some suggestions are given. Full customization can be made later on using the advanced settings: see Course progression for details.
The unlock condition states when the exercises are available. You can either have everything open from start, or have each set require that 80% of the previous set is completed.
Deadline is the moment, when the submissions has to be made. TMC refuses to accept any attempts after that. You can choose to have no deadlines at all, weekly deadlines or just single deadline for all exercises. Insert first set deadline if needed. You can also set "soft" deadlines later on using the advanced settings.
For example, you can choose to have 80% of previous unlock condition, and weekly deadlines starting from 1.1.2017. By clicking "Fill and preview", you will see the settings in the preview section.
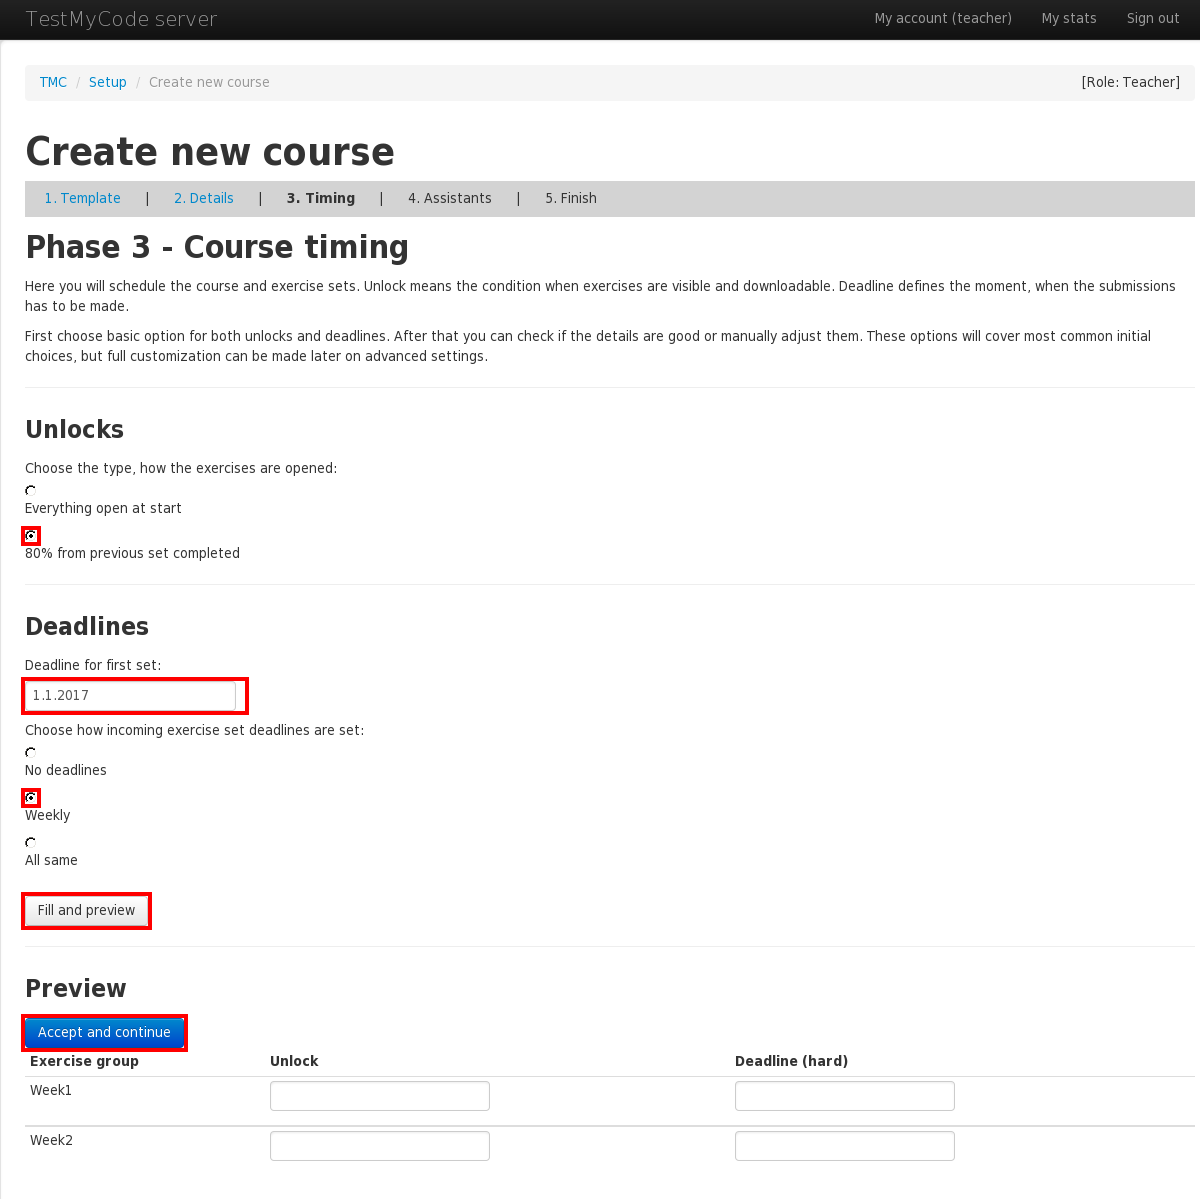
You can also manually adjust the settings in the preview section. After you have verified that settings look good, click 'Accept and continue'.
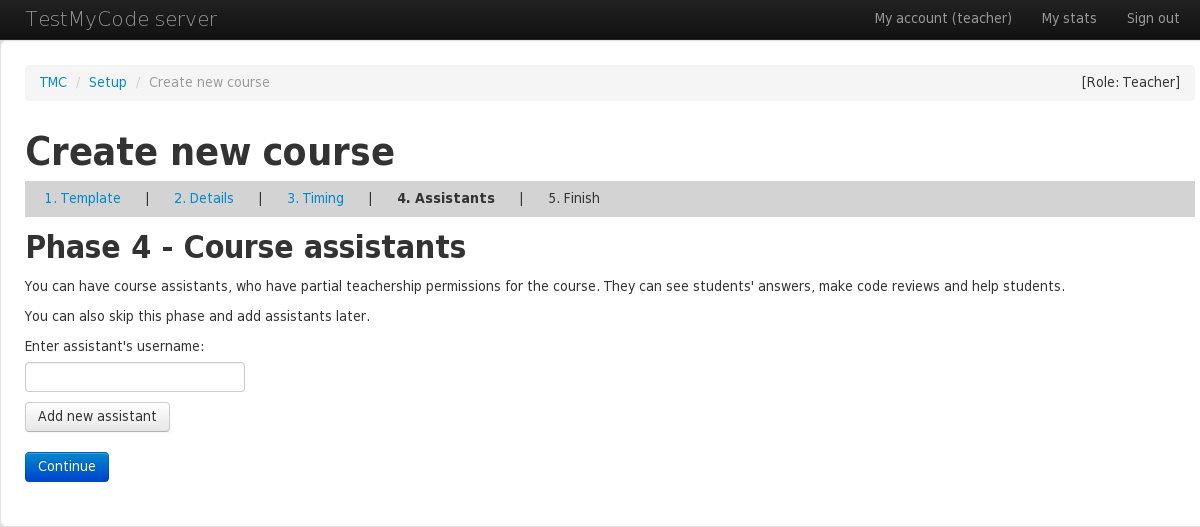
If you already know your course assistants, you can add them to the course now. Just fill in their TMC usernames and click 'Add new assistant'. You can add more assistants later. When you are ready, click 'Continue'.
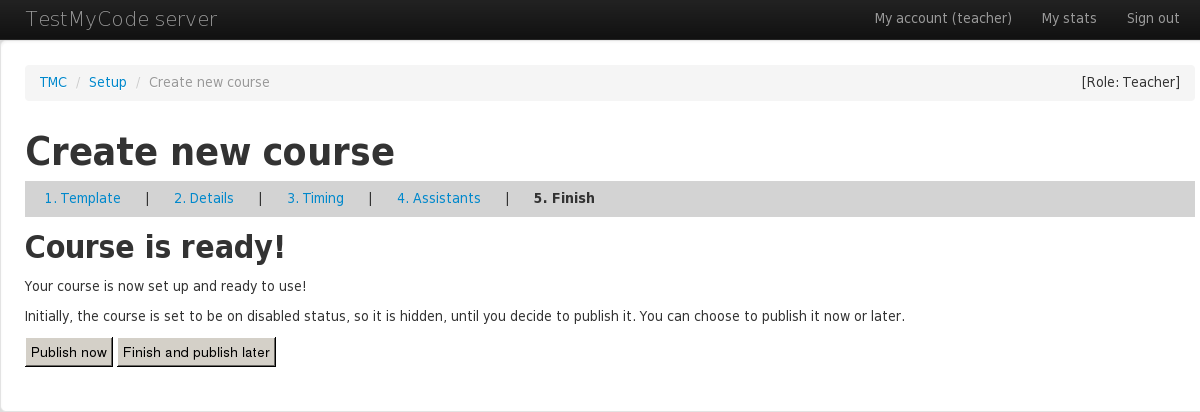
The course is now ready. You can choose to publish the course right away, or keep it hidden and disabled until it is ready to be published later. Click either of the buttons, and you will be redirected to the course main page.
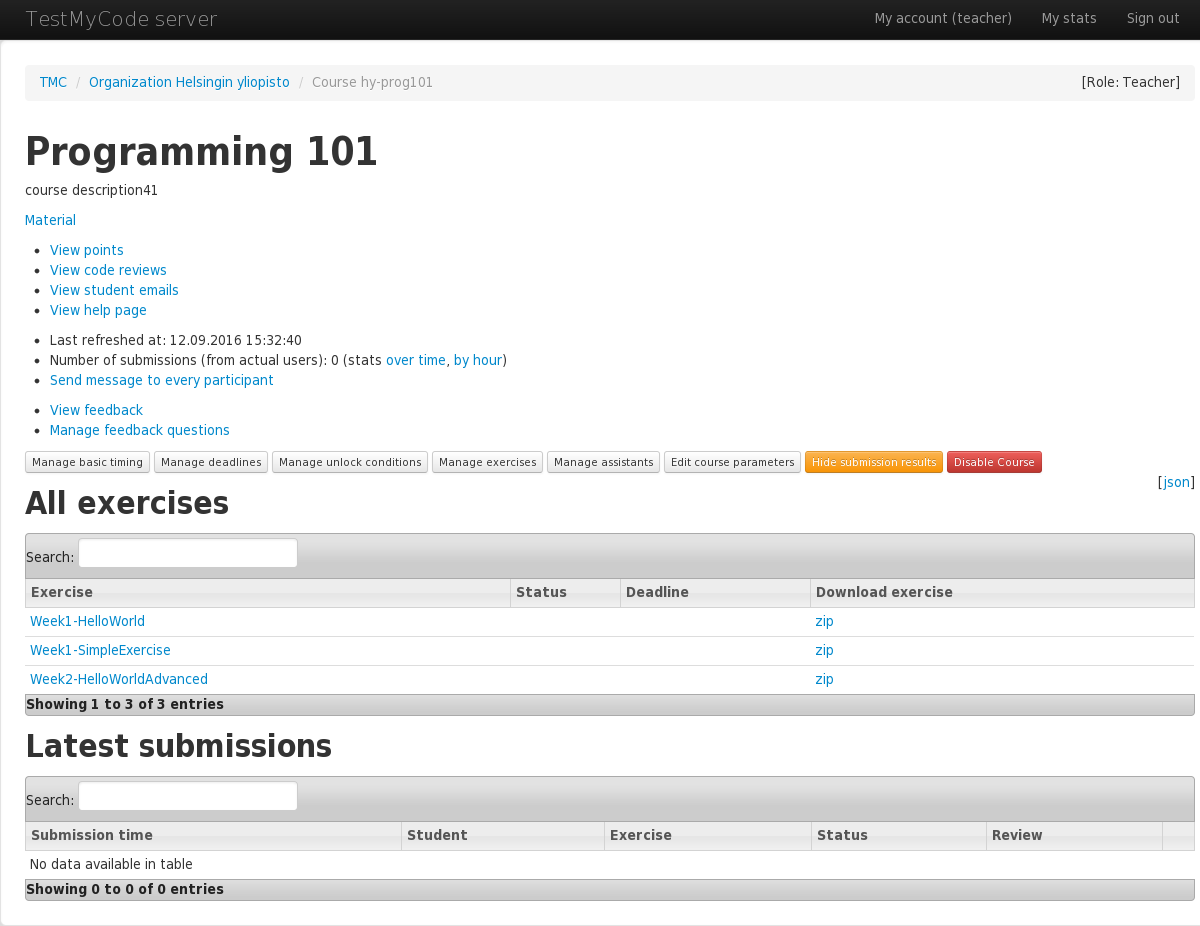
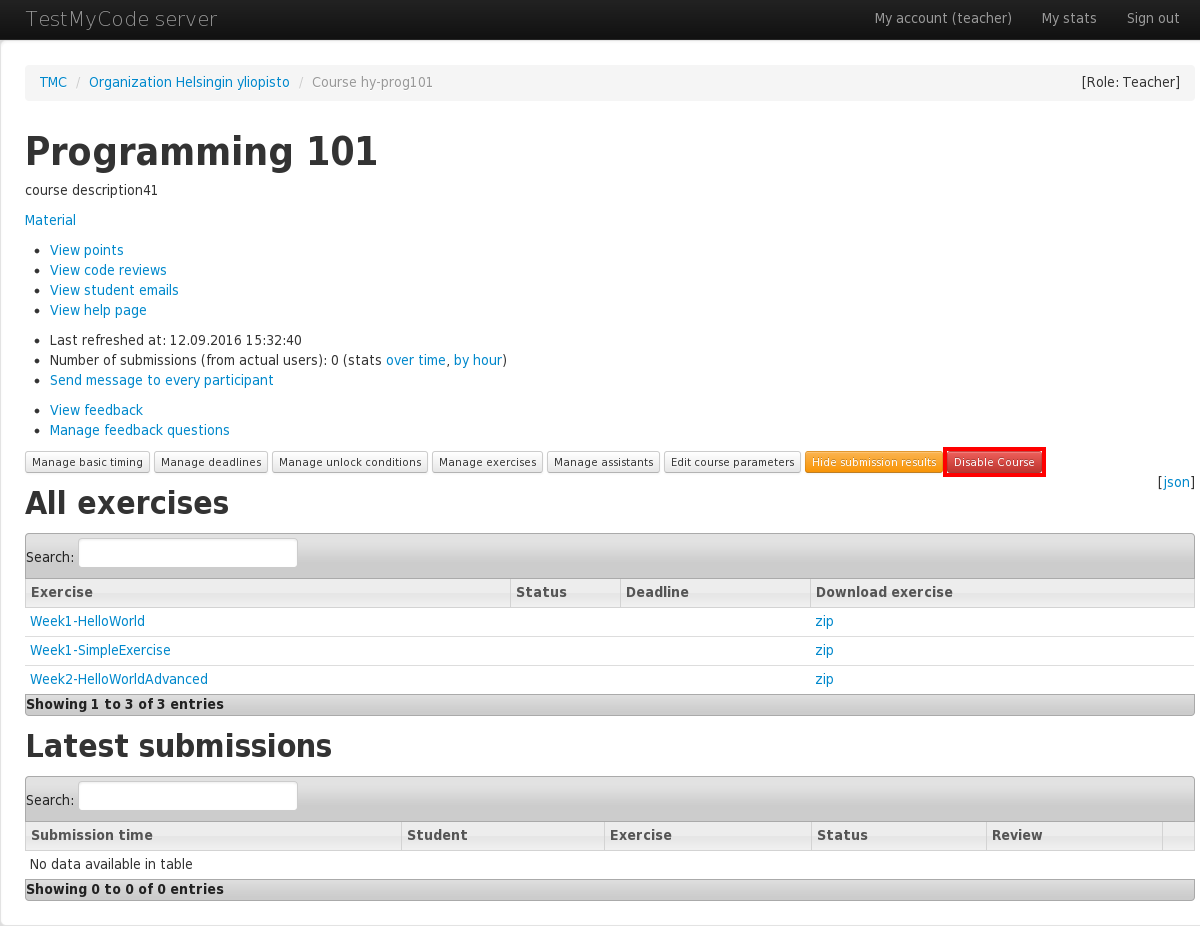
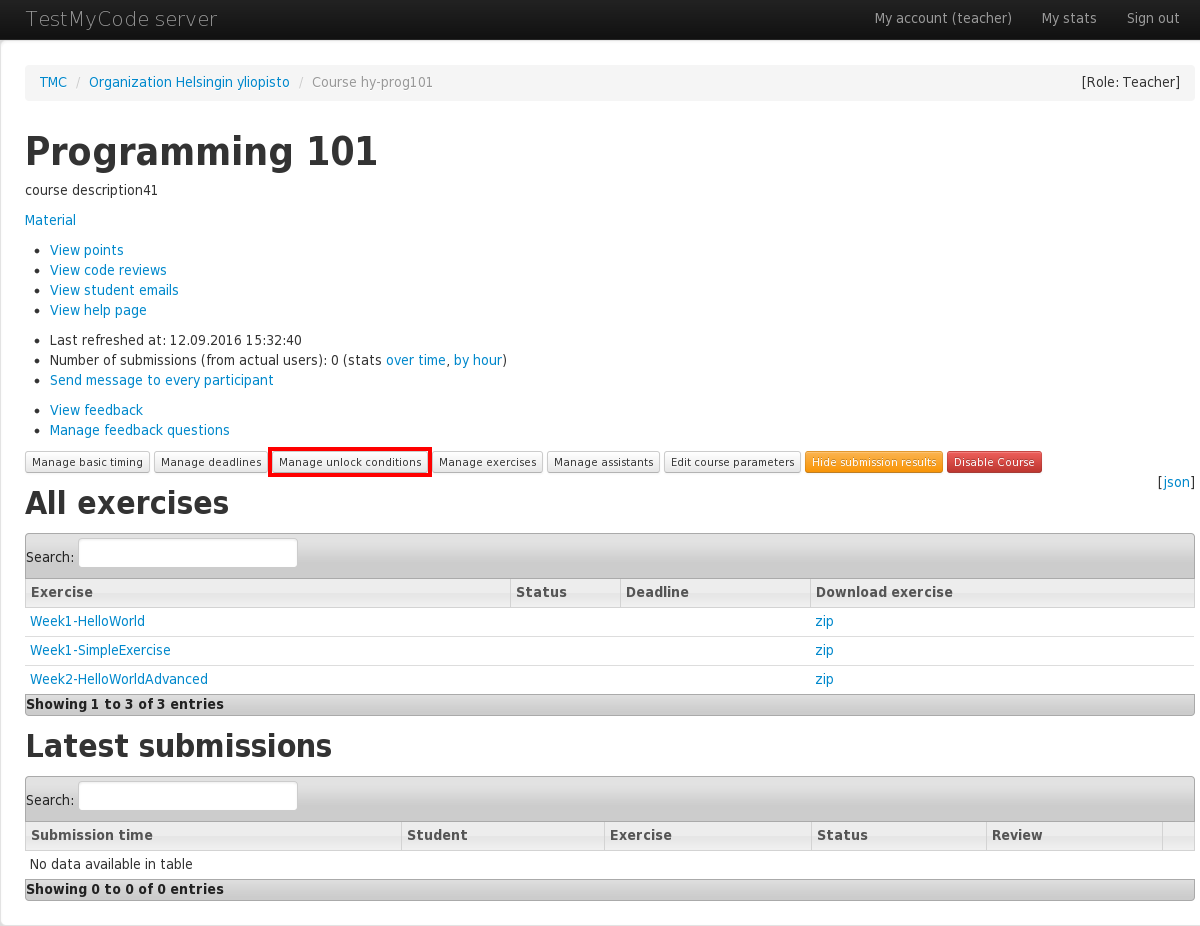
Here you can see any submissions sent to any of the exercises in this course, view model solutions, make code reviews etc. You may also access the course page from your organization's page.
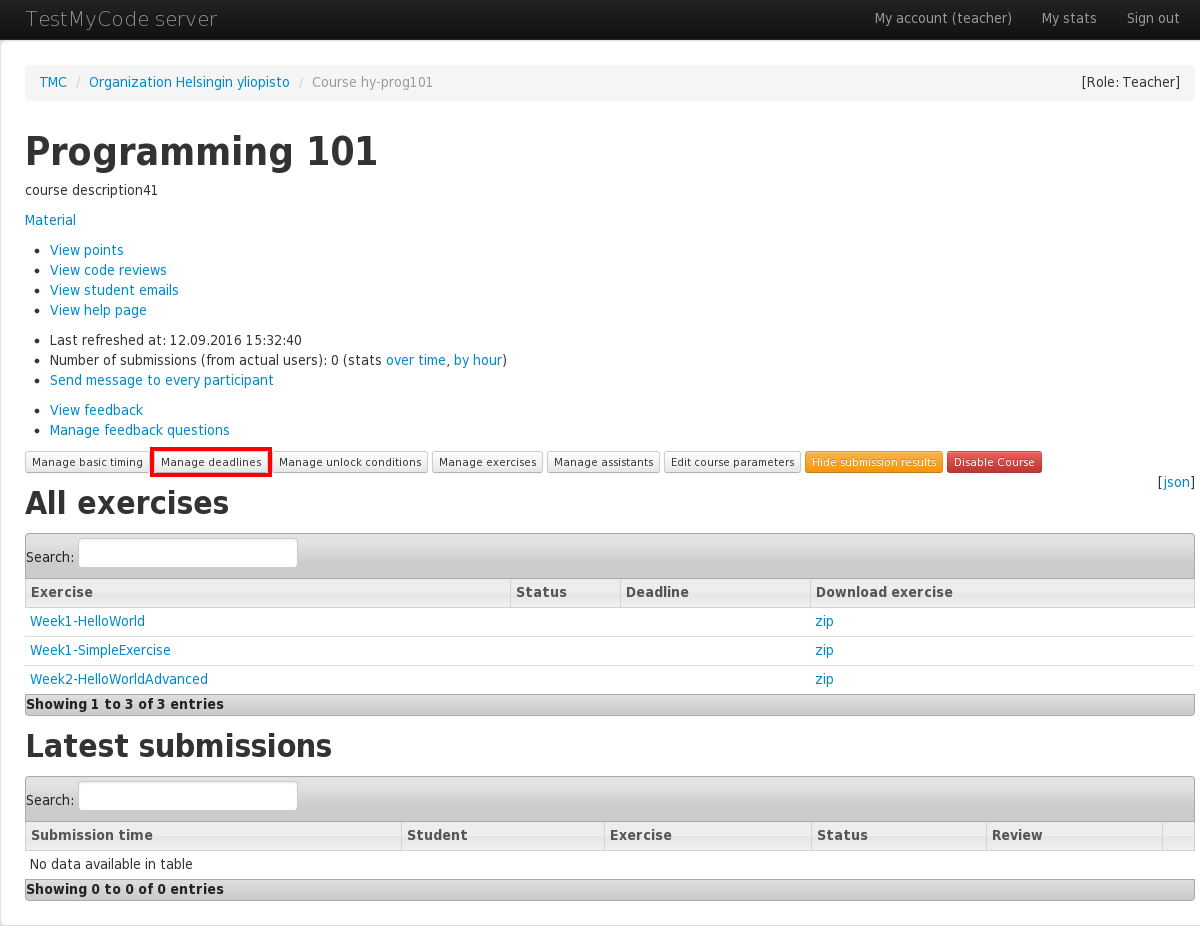
The main course page is divided into sections. First, you have the general management part, which contains links to exercise, deadline, unlock condition, assistant and general course option management screens. After that, there is the exercise list, and at the bottom, you can find yours students' submissions. Remember that as a teacher (or assistant), you will see all submissions from all students, while students see only their own submissions.
You can edit the previsouly entered course information and some other things by clicking the 'Edit course parameters' button.
The technical course name is permanent, and it can't be edited.
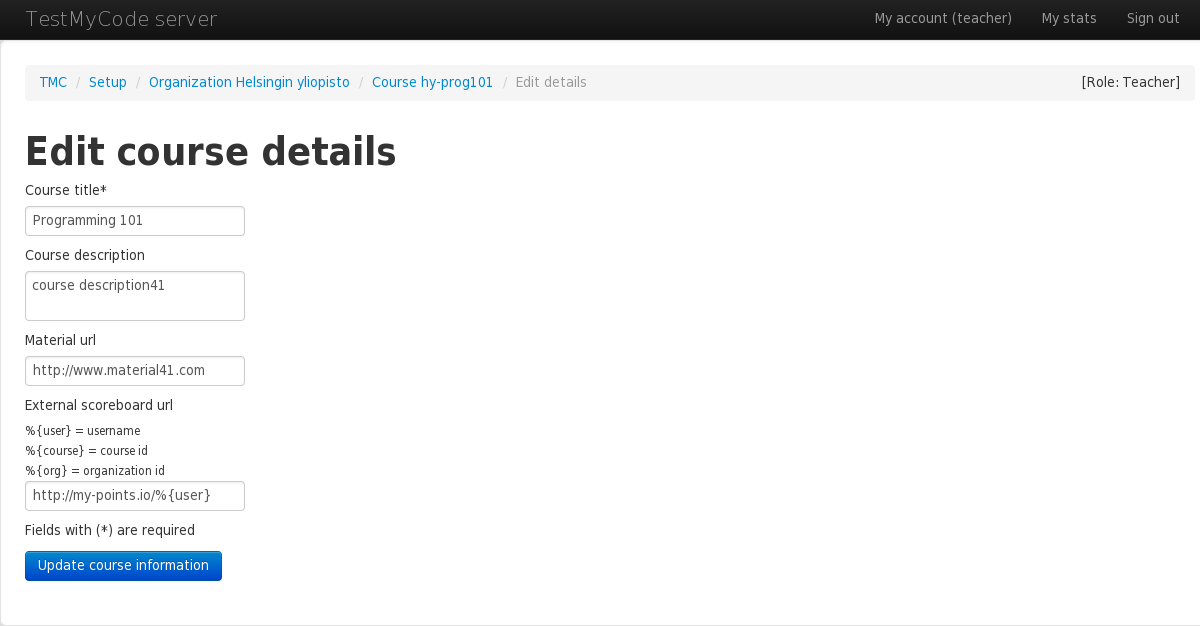
If you want to use an external point awarding system, you can enter its URL to the 'Custom points URL' field. You can also use a template string that will generate the URL dynamically. For example, http://my-custom-points.io/%{user} would show as http://my-custom-points.io/MyUsername when viewed by the user MyUsername.
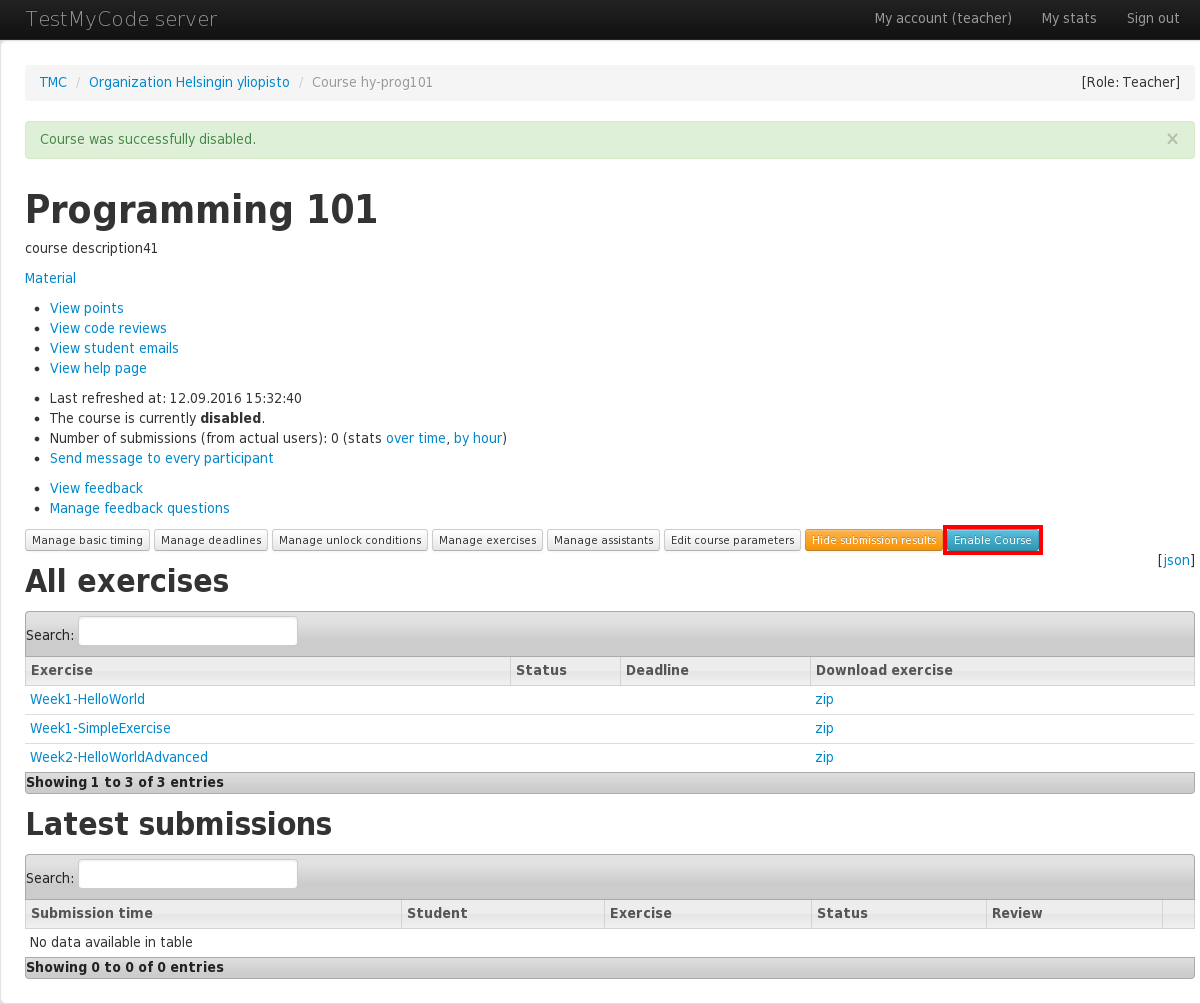
A course may be disabled so that it won't accept submissions. You might want to do this if you're not satisified with your course and wish to start a new one, if you want to configure your course without worrying about students using your course, or if you want to force students to take a vacation. Disabled courses can be re-enabled at any time.
Simply click the 'Disable Course' link to disable course.
Click 'Enable Course' to enable it again.
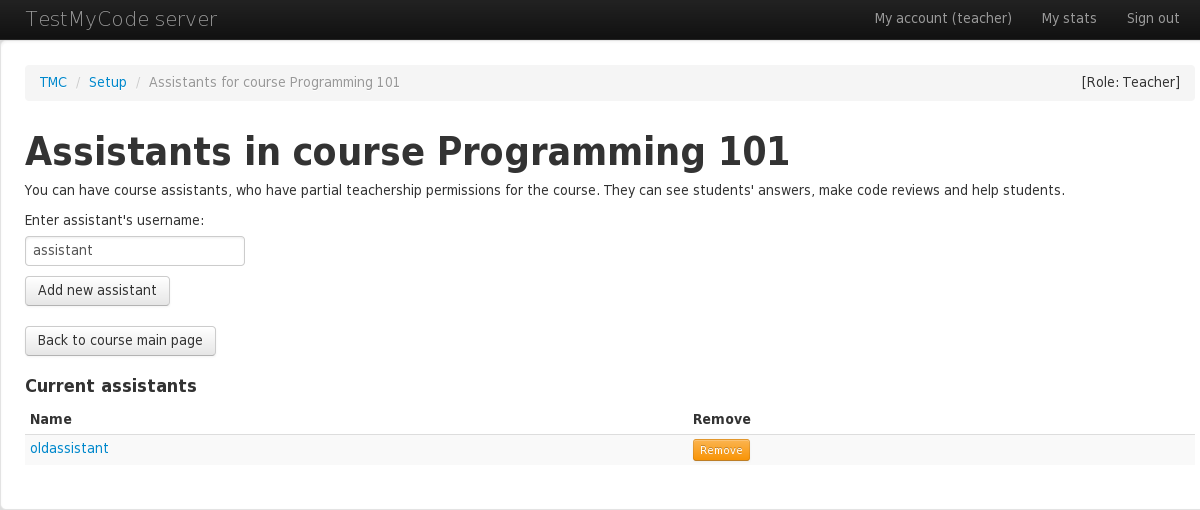
Course assistants have teacher permissions for single course, instead of the whole organization. You can add course assistants by going to course page and clicking the 'Manage assistants' button.
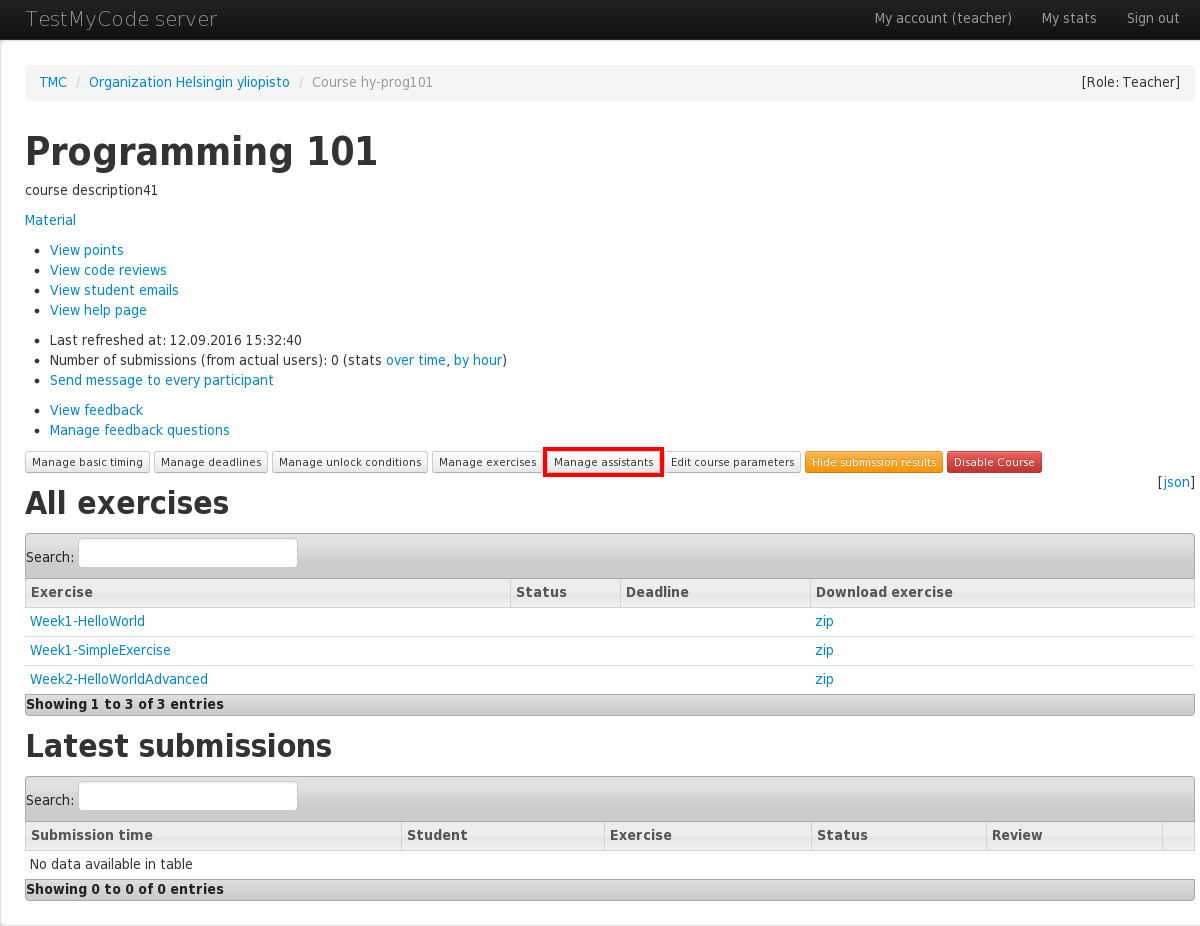
Adding a new course assistant works same way as adding new teacher: enter the assistant's username and click 'Add new assistant'.
To control course progression, each exercise and exercise group may be configured with deadlines and unlock conditions. If you wish to modify these, it's important to understand the concepts of a deadline and an unlock condition.

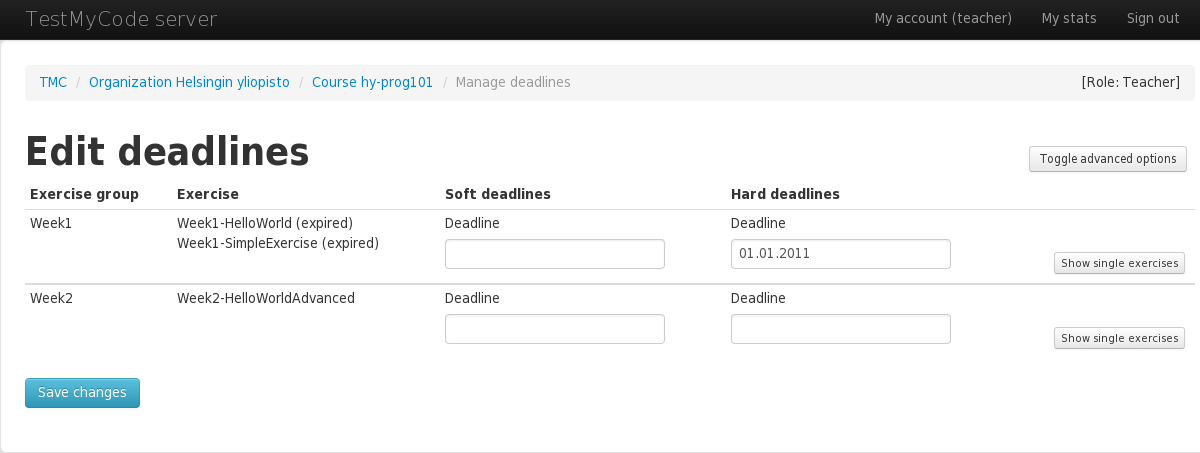
There are 2 kind of deadlines. A soft deadline is a deadline which is shown for students, but TMC will accept and process submissions even after that, only flagging them as late. A hard deadline is a strict deadline: when it has passed, TMC refuses to process any submissions.
Choose the deadlines depending on your needs. For example, you can set soft deadlines for every friday evening, and hard deadline for sunday evenings to give students few days extra time if thay fail to submit in time. You can then take into account the late submissions in the grading with f.ex. a slight penalty.
Deadlines can be expressed as a time and date, in which case they are shared by all students, or alternatively set as time spans, so that each students has a certain time to finish the unlocked exercise after he or she first unlocks it.
The unlock condition determines when the exercise is available for the student. Two most common cases are fixed date (exercises open for all students on a certain date), or some percentage of previous exercises completed (each student can progress when he or she has completed enough of the previous assignments).
To setup deadlines for the exercises, click the 'Manage deadlines' button from the course's front page.
Common deadlines are configured by date or date-time. TMC understands multiple formats, for example:
Another way to setup deadlines is to use unique unlock-based deadlines. It means that deadline for each student is based on the time they unlocked the exercise (see Unlock conditions). For example, to give students 2 weeks to complete an exercise after it becomes available, set the deadline to unlock + 2 weeks.
All possible valuers for unlock-based deadline are:
unlock + <N> [minute[s]|hour[s]|day[s]|week[s]|month[s]|year[s]].
To edit unlock-based deadlines, advanced options must be enabled by clicking the button in the top right corner of the page. If both date-based and unlock-based deadlines are enabled for the same exercise, the one which expires first will be used.
Exercises are organized into pre-defined groups. By default, deadlines are set per group, so that all exercices in the current group will get the same deadline. If you need more customization, you can click 'Show single exercises' and set deadlines at single exercise level.
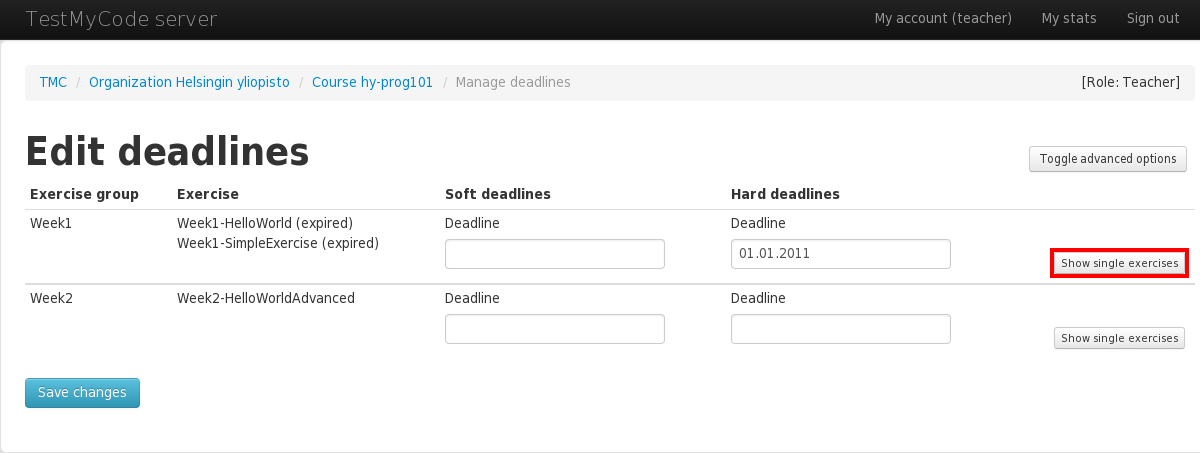
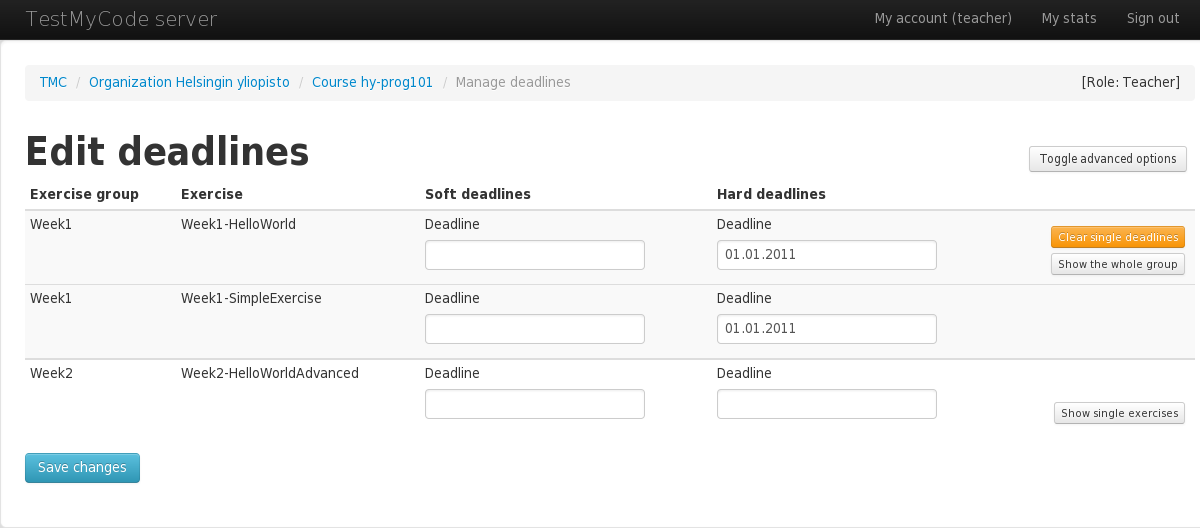
If the exercises in a group have differing deadlines, the group deadline input fields will be disabled and show 'various, so you can't accidentally override exercise specific settings.
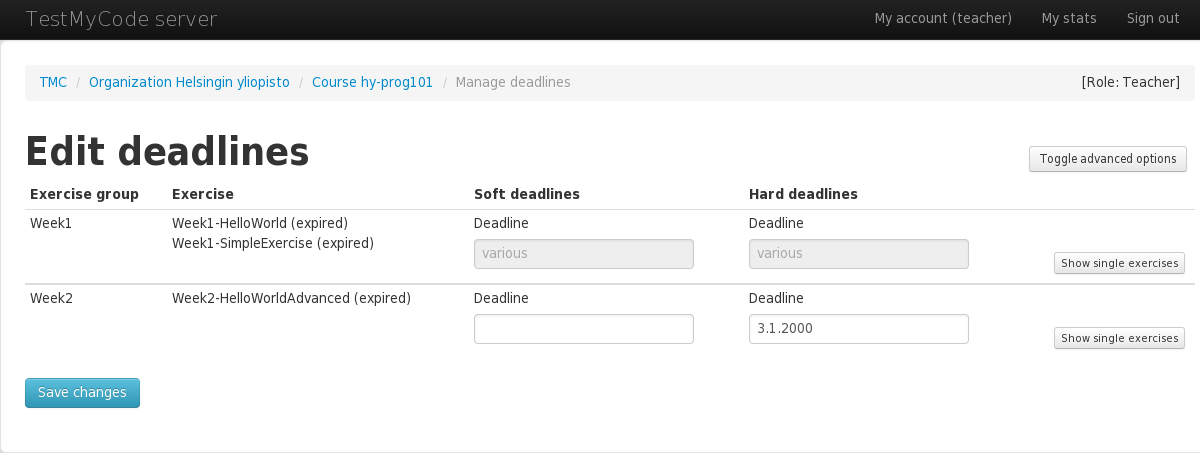
If you want to edit the deadlines for the whole group again, you need to change the single deadlines so they all match within the group. You can also reset the whole group by clicking 'Clear single deadlines'.
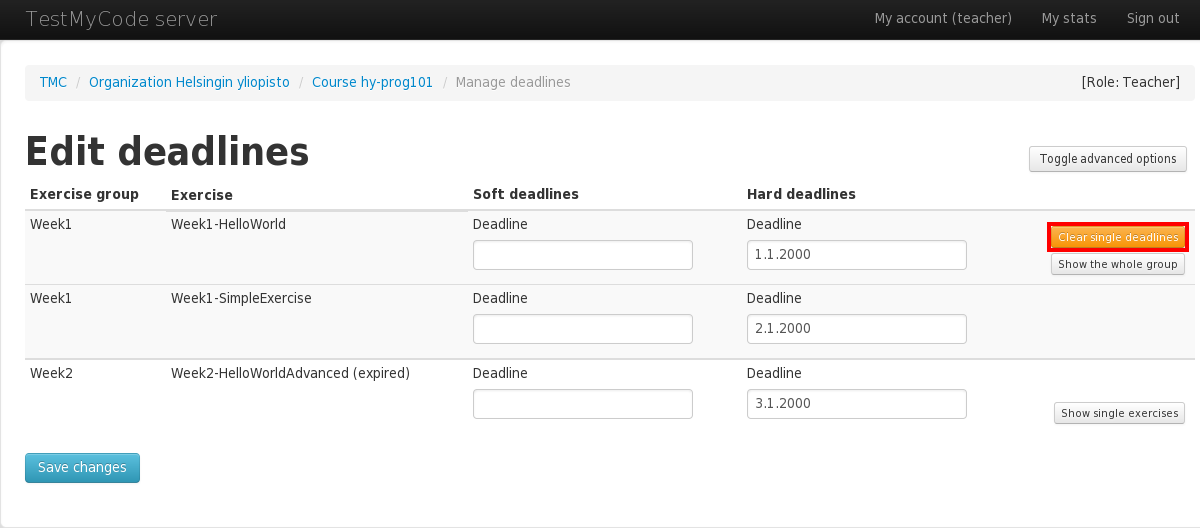
When you are done with the settings, remember to click 'Save changes' at the bottom of the page.
After creating a course from template, the deadlines may already be defined depending on the course template configuration.
If exercise or exercise group has an unlock condition attached to it and it has not passed yet, exercise will not accept submissions. If there are no unlocks set, exercise is always active.
Unlock conditions can be set by clicking 'Manage unlock conditions' in the course page.
Unlock conditions may be set for each exercise group separately. You can add multiple unlock conditions for the same exercise group by clicking 'Add a condition'. If multiple conditions are defined, all of them must be true before the exercise is unlocked.
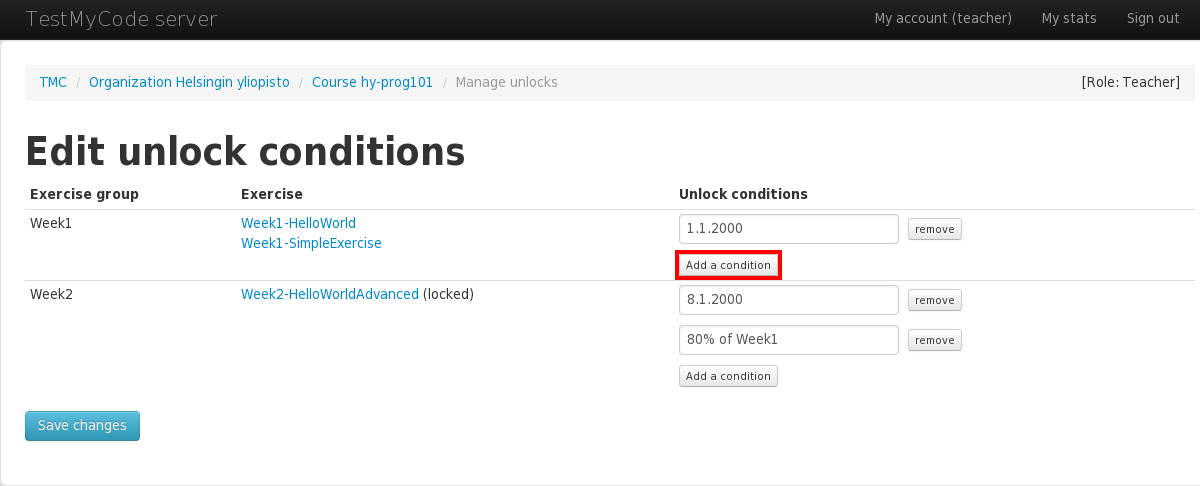
The conditions that can be used are:
exercise [group] <exercise-or-group>point[s] <list-of-point-names><N>% [in|of|from] <exercise-or-group><N> point[s] <exercise-or-group><N> exercise[s] [in|of|from] <exercise-or-group><date-or-datetime><exercise-or-group> is the exact name for the exercise.
Some common examples:
1.9.2016
80% from exercice-group-X
exercise important-exercise
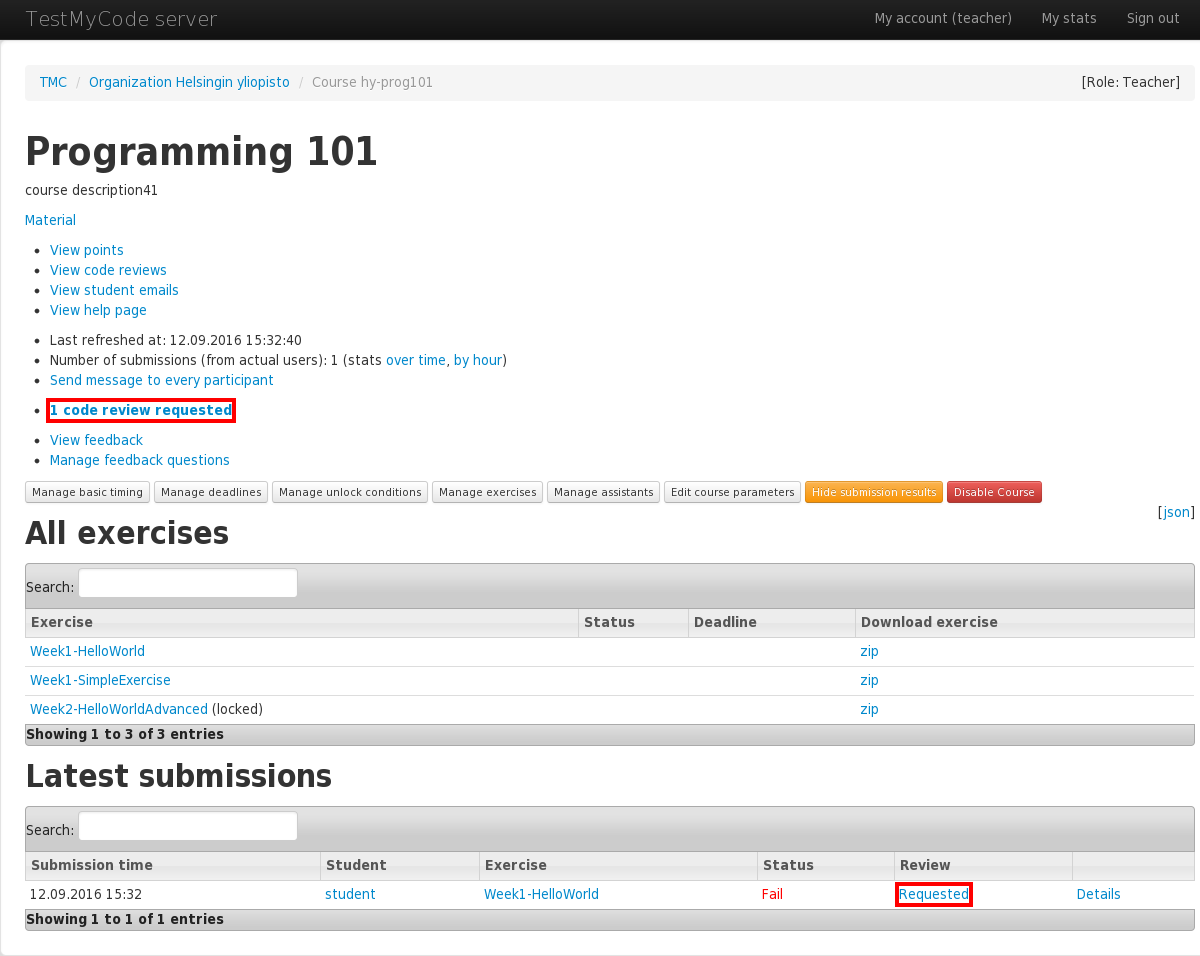
Code reviewing is a process, in which a course teacher or a assistant goes over the code in a submitted answer and reviews it, providing comments for the students. Some exercises require a codereview to be completed. Students can also manully request a code review.
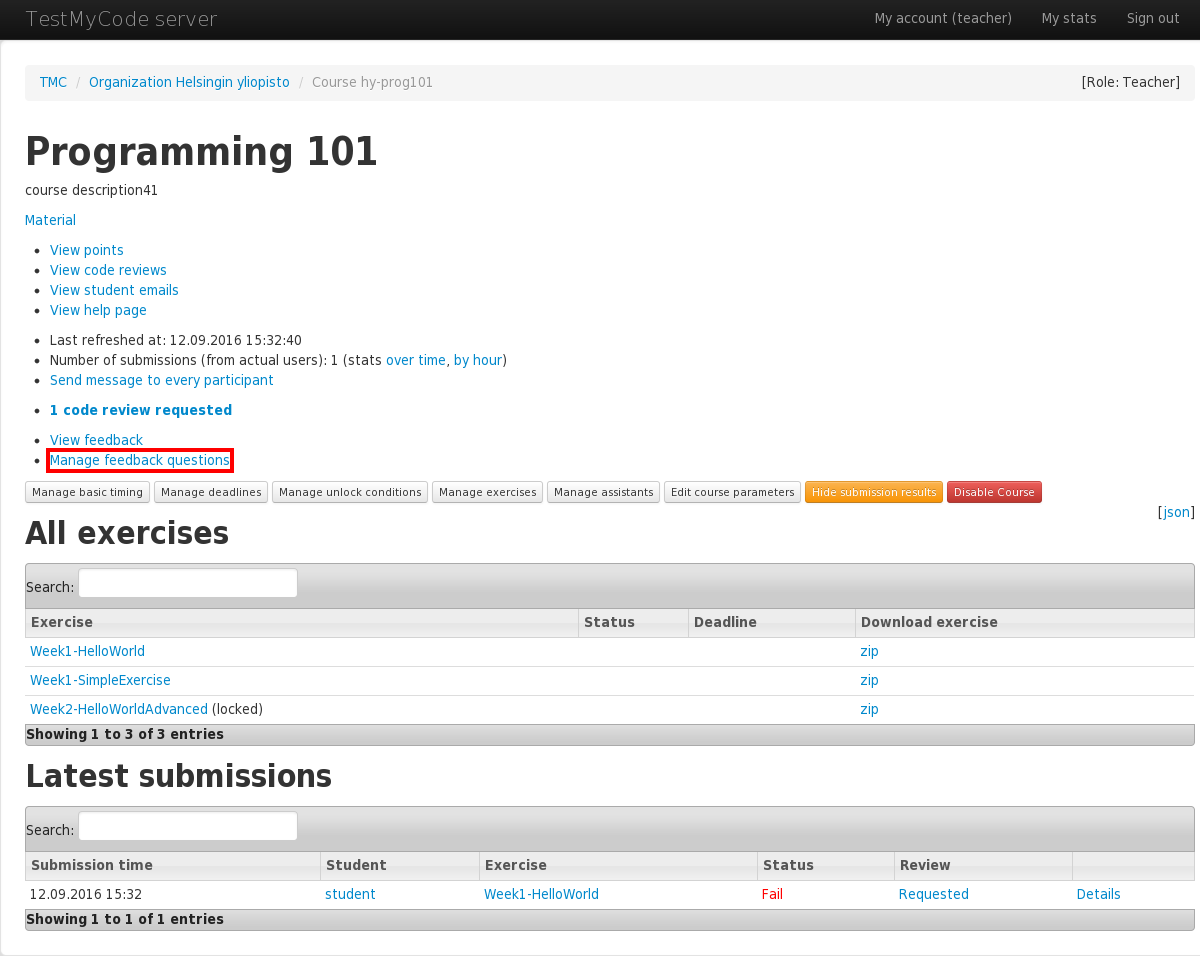
If there are any unreviewed requests, the course front page has a link 'n code view requested'. You can start the review process by clicking on that link. Furthermore, the submission list on the bottom of the page shows whether each submission requires a review.
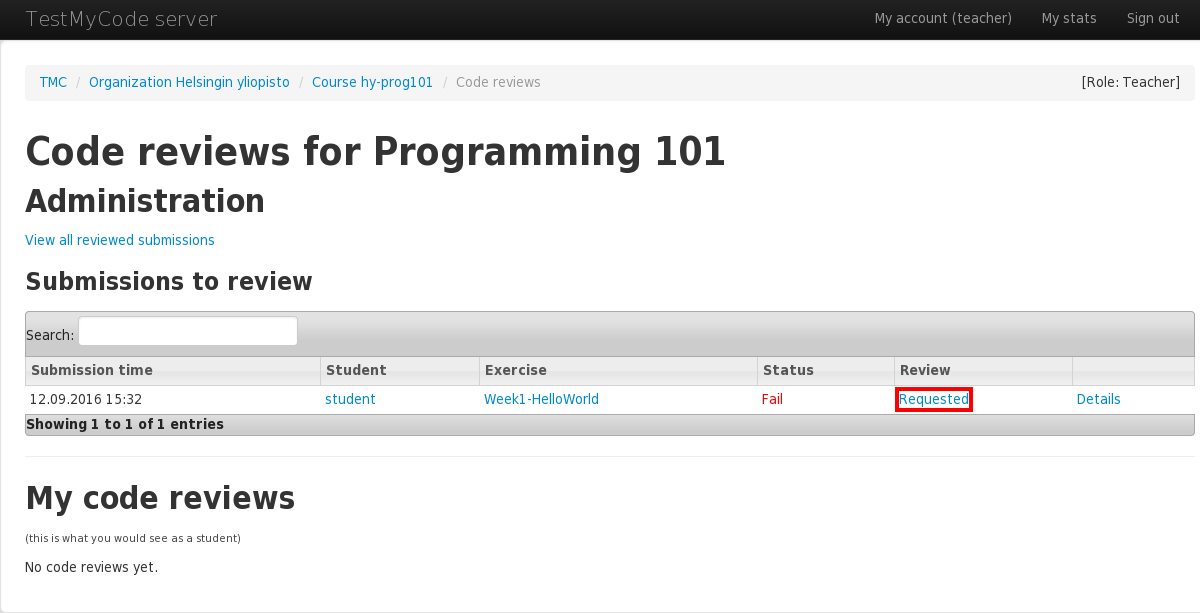
The Review page shows all submissions which still require reviews. Click the 'Requested' link for the submission you want to review.
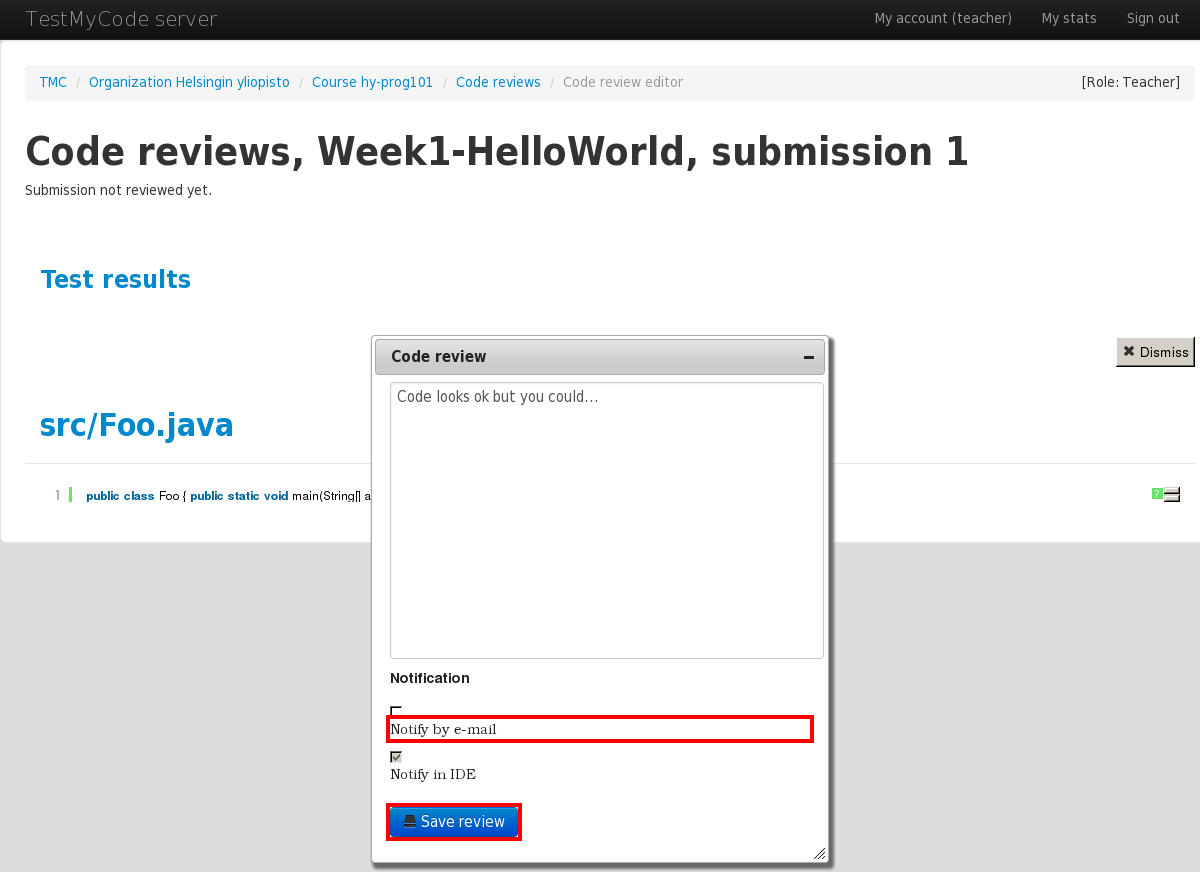
On the review screen, you can see student's code at the bottom of the page. Test result visibility can be toggled by clicking 'Test results'. When you have looked the code, click 'Start code review' to write your feedback.
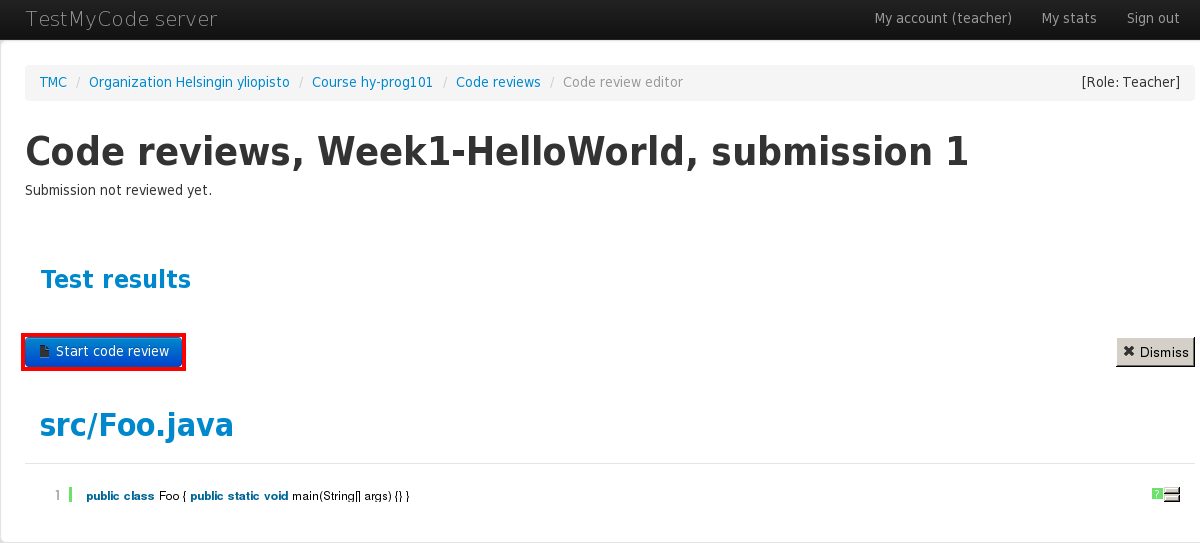
Write you review text in the text area. If you want to notify the student by email, you can check 'Notify by e-mail' checkbox. When you are ready, click 'Save review'.
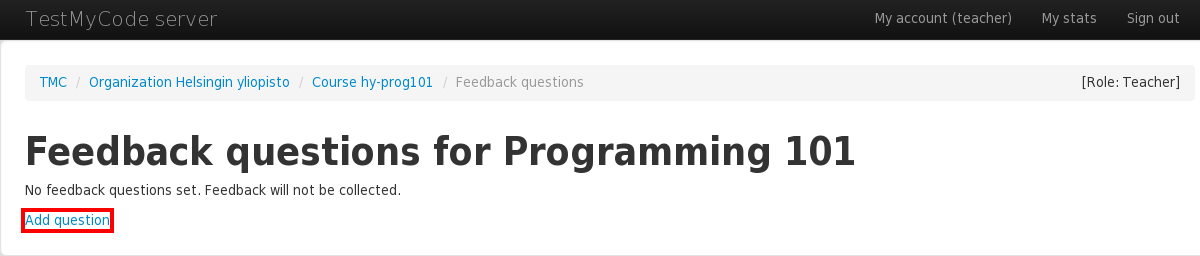
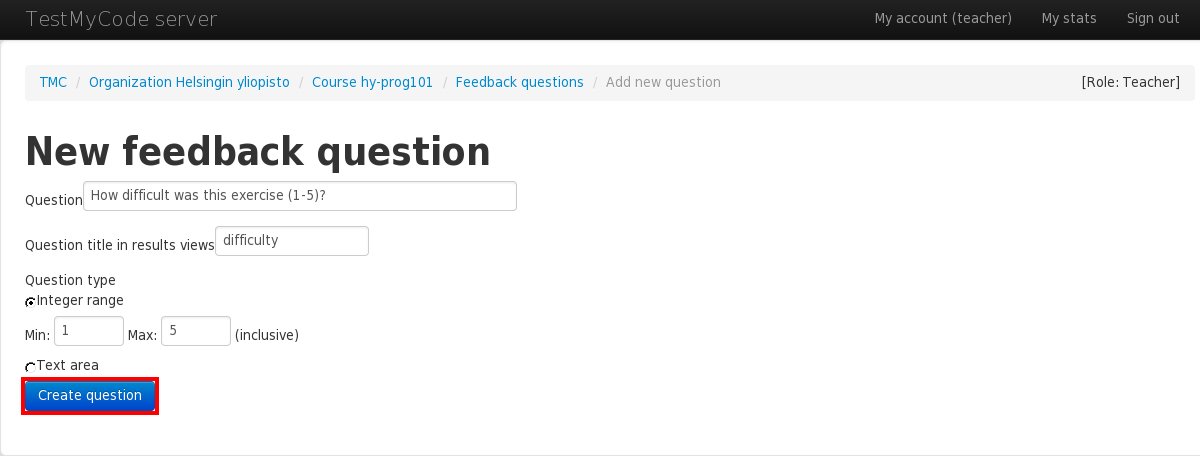
Every course can have feedback questions, which are show to the student after a successful submission. A question can be either free text answer or number value for selected range. For example, a numeric question could be "How difficult was this exercise? (1-5)", and a text question "What problems you had in this exercise?".
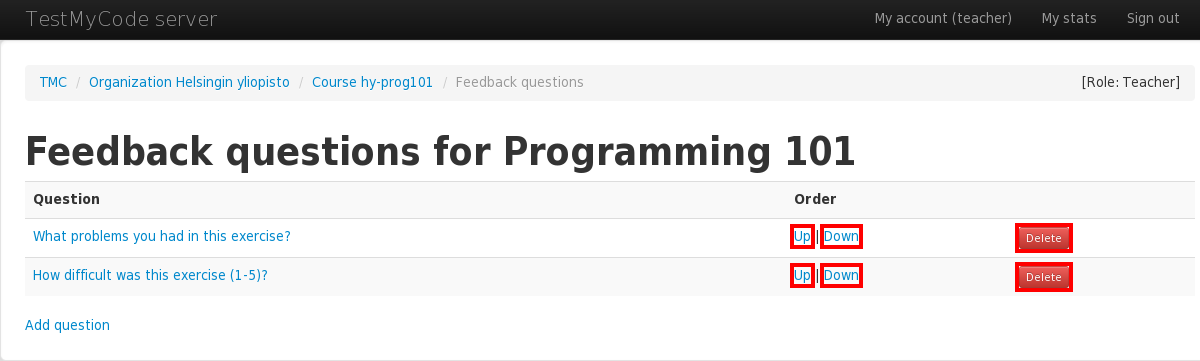
Questions can be configured by clicking 'Manage feedback questions' from the course front page.
A new question can be added by clicking 'Add question'.
First enter the actual question text and a short title. These are shown in the result view. If you want to create a free text question, choose 'Text area' as question type.
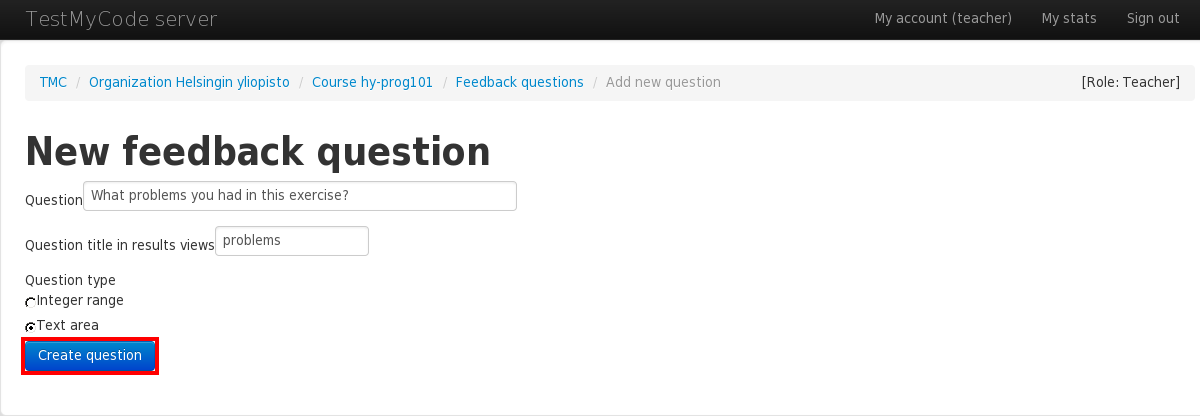
If you want to create a question with number value answers, for example a Likert scale for purposes of statistical analysis, you can choose the 'Integer range' option. New input fiels for minimum and maximum values are shown.
You can adjust the order of the questions with the 'Up' and 'Down' options. Question can be removed by clicking 'Delete'.
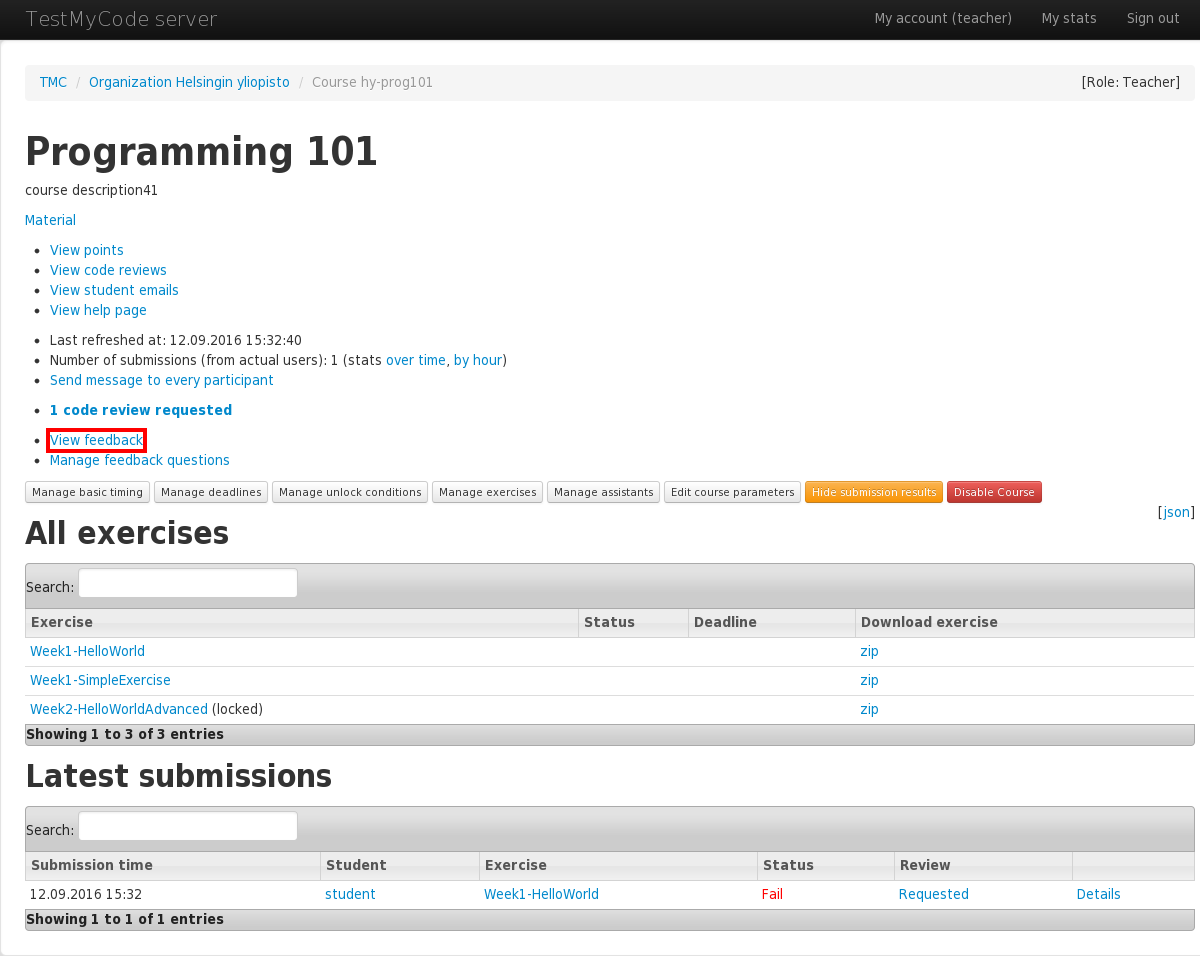
After students have answered the questions, the answers can be viewed by clicking 'View feedback' from the course main page.
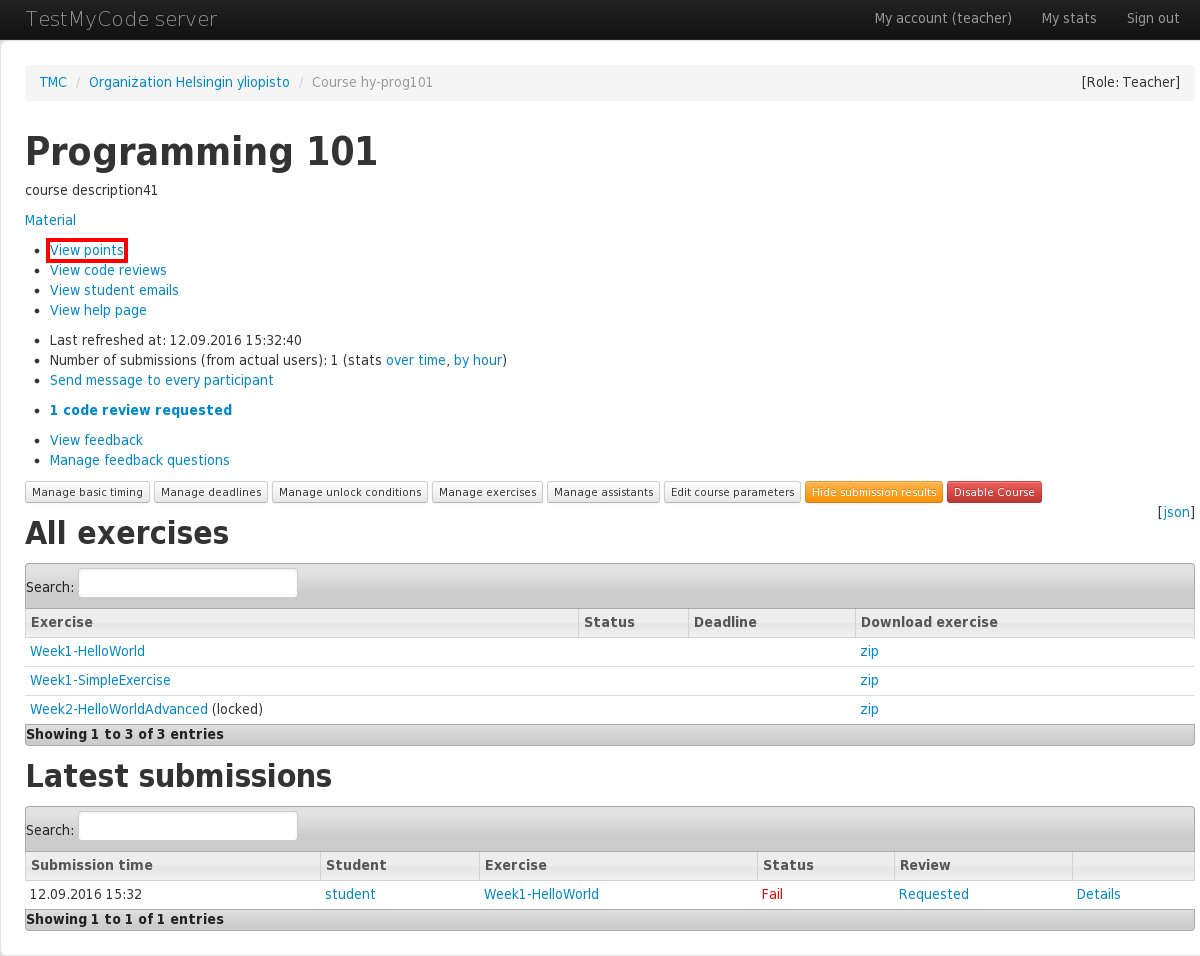
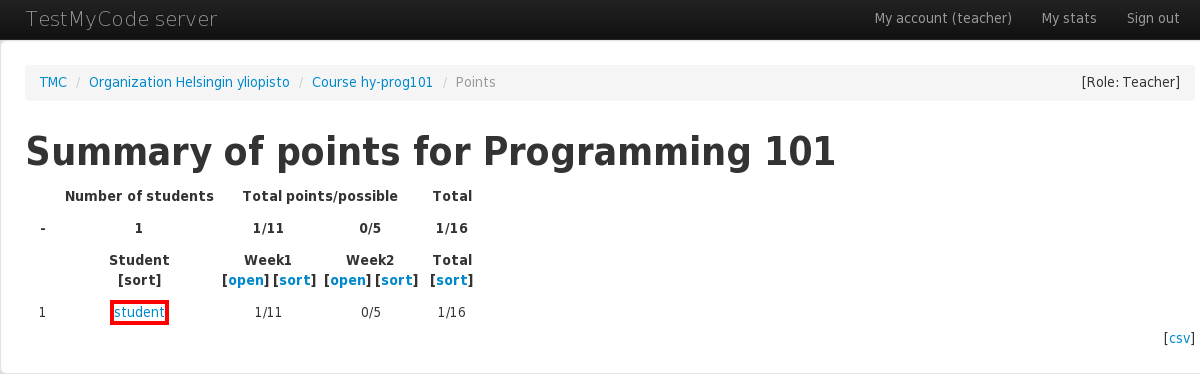
Students' current progress can be check from the points page. It is accessible through the 'View points' link from the course front page.
This page show a summary of all students and exercise groups. If you want to see single student's data, click his or her username.
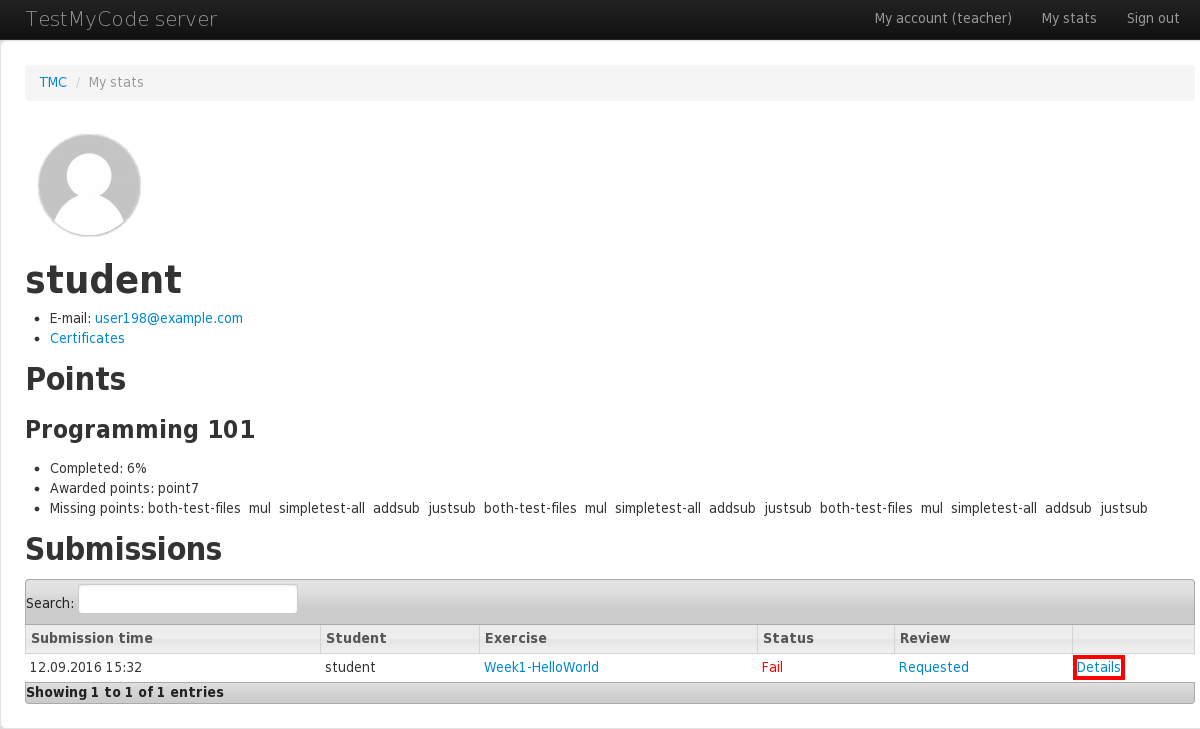
On the student's page you can see summary of his or her progress on all courses. At the bottom of the page there's list of his submission history. If you want to check some single submission's data, you can click the corresponding 'Details' link.
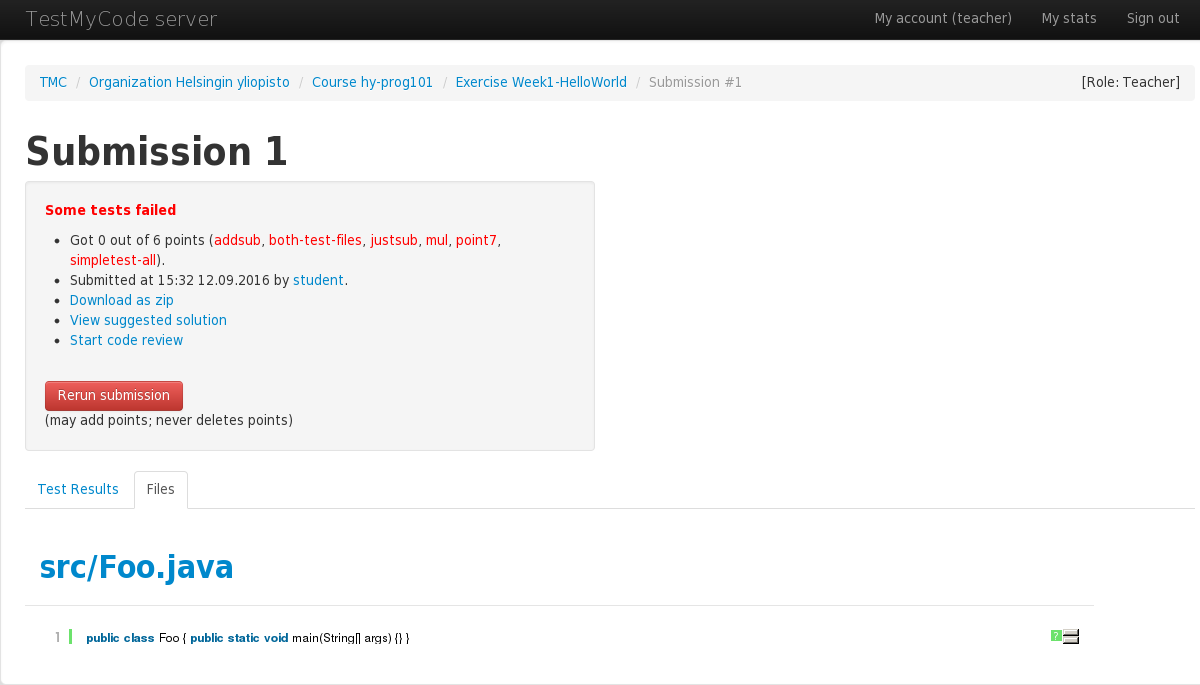
On the submission details page you can see all relevant data for that submission, including the student's answer, test results, and a suggested solution. You can also rerun submission and start code review. Rerunning submissions will never deduct points, but can give them if the code failed to pass tests due to f.ex. randomness.
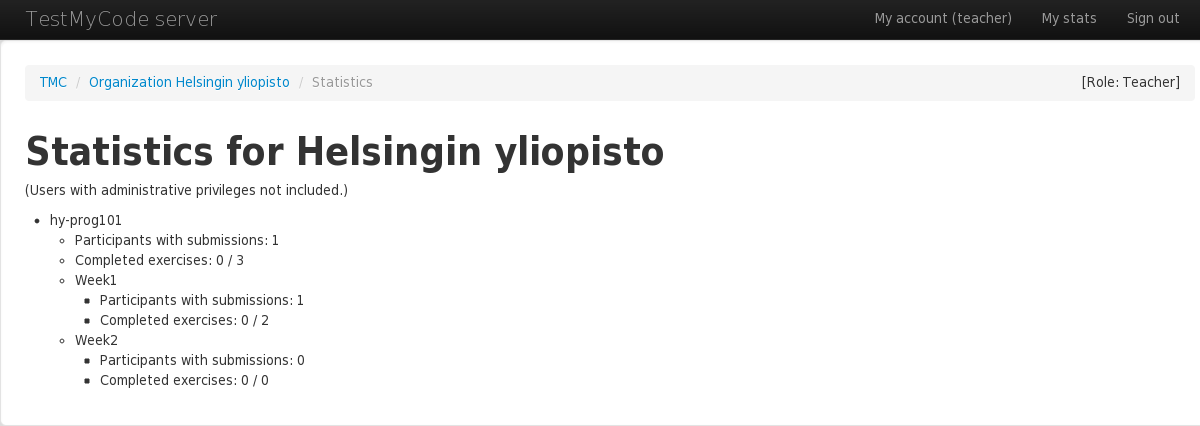
From the organization front page you can view some statistics by clicking 'Show statistics'.
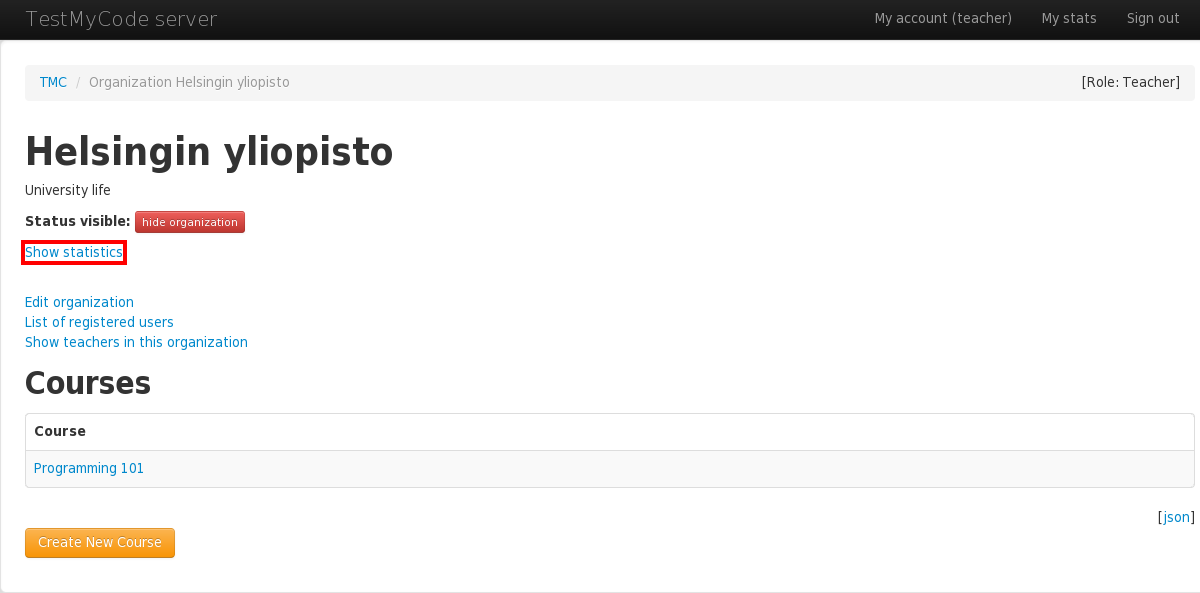
The statistics page lists information about participants and completed exercises for all your organization's courses.
TMC has support for creating your own courses from scratch, without using the offered course templates. This option might be disabled on the TMC server you are using, and may not be supported. Normally you don't need to bother with that, and it is for advanced users only.
See Guide for custom courses for details on this feature.
For the TestMyCode service provided by the University of Helsinki, this feature is in closed beta. If you would like to participate, please contanct us via email.